

Tutorial: finishing a tiny embroidered pillow
With pulled thread or cutwork embroidery
Finishing is something that a lot of people struggle with. When you have spent many hours embroidering, you should take your time and carefully do the finishing. A rushed careless job will not do justice to your beautiful embroidery. Take your time, do it accurately and carefully.
When you make a small pillow out of an embroidery, such as for a pincushion, the embroidery should be centred. The seams along the sides should follow the grain of the fabric. The corners should be square.
Sometimes you have an embroidery that has holes such as from cutwork or pulled thread work. To make it into a pillow, you’ll need to put lining fabric behind it so that the pillow’s stuffing doesn’t show through. However, that lining can make it difficult to sew the pillow so that the seams accurately run along the grain lines of the fabric. So how do you do it?
This is how I do it.
First, I decided that I wanted my pillow to be 8 x 8cm (about 3 1/8 x 3 1/8 inches). I wanted to use a seam allowance of 1.5cm (about 9/16in) though I could just as easily have made it 1cm (3/8in). This meant my fabric needed to be trimmed to 11 x 11cm (4 5/16in).
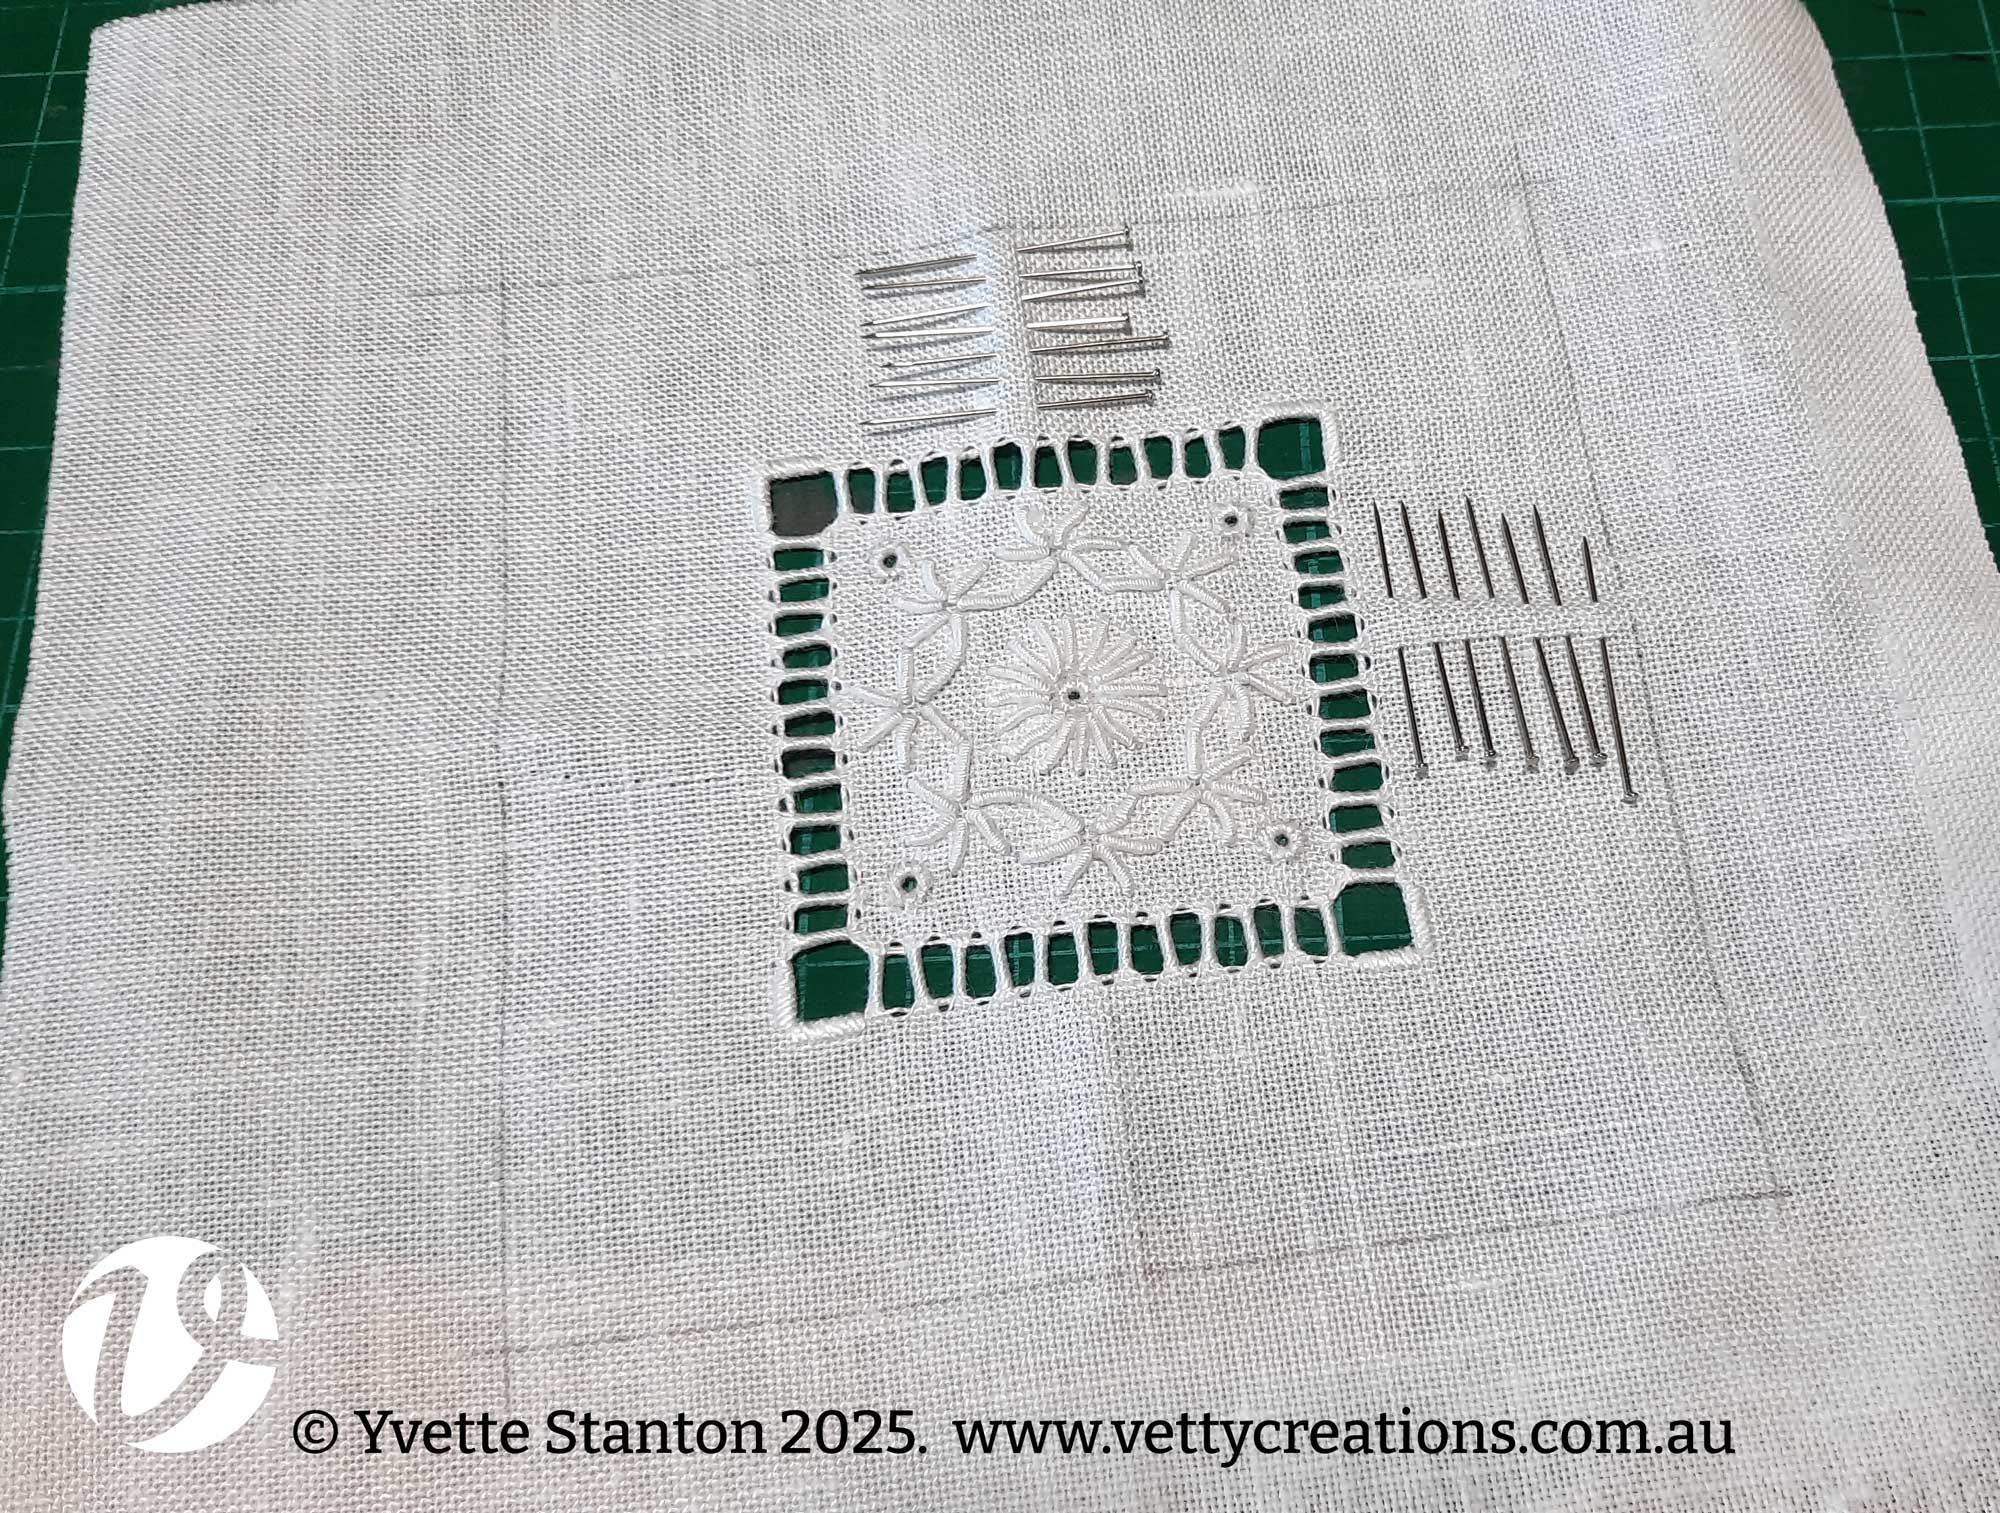
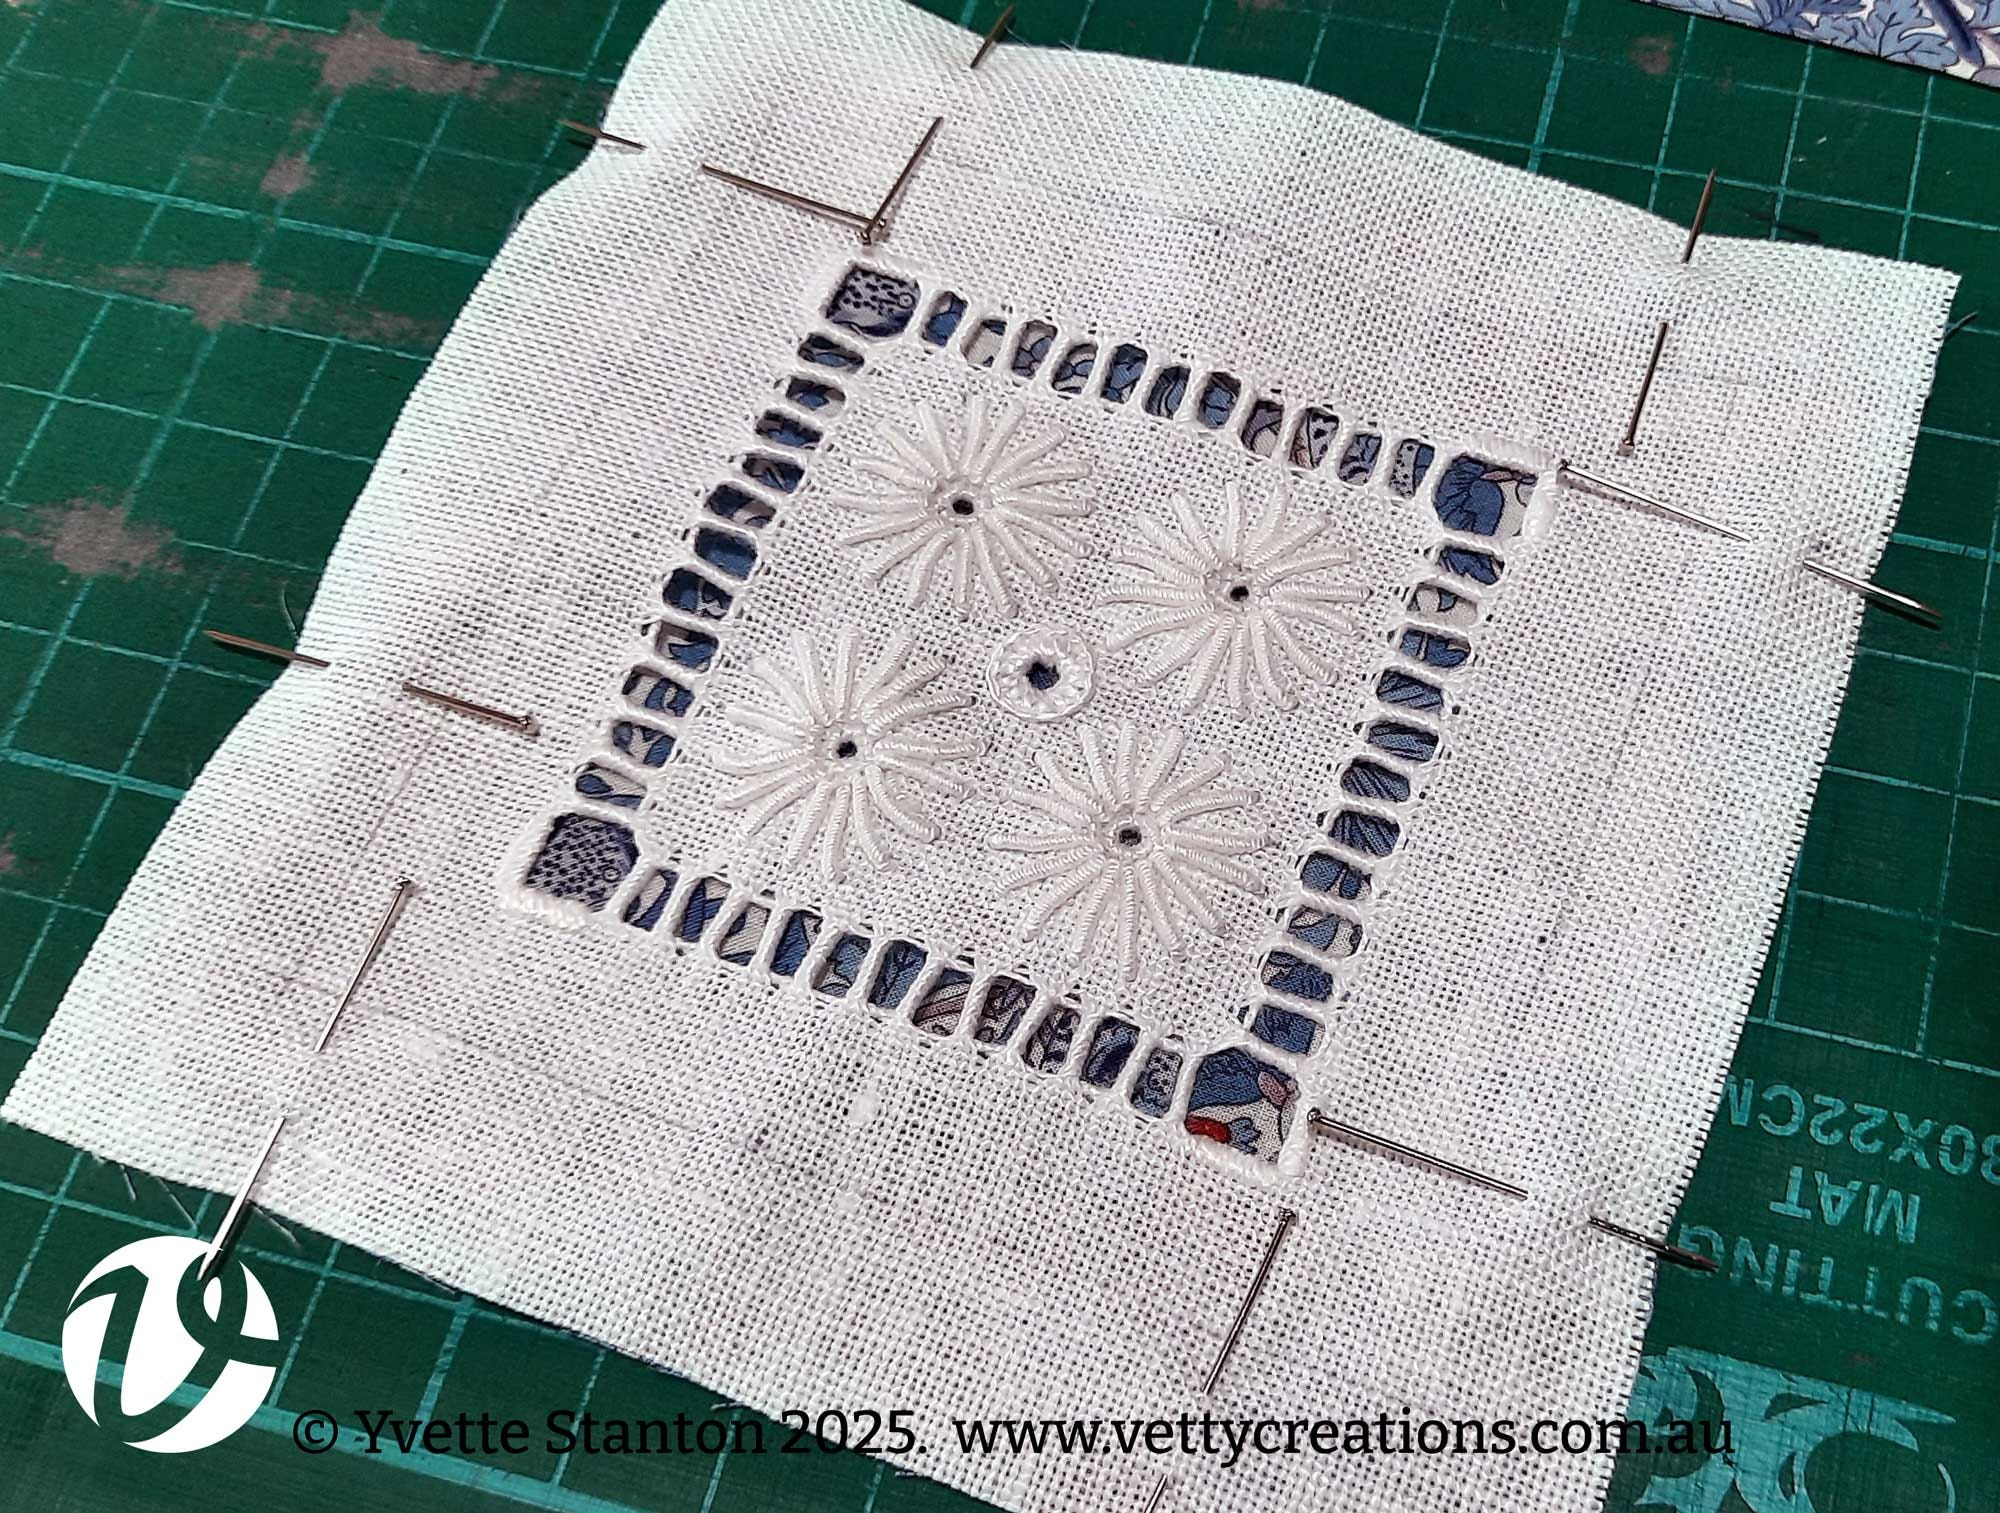
From the centre, I measured so that there was an even amount of fabric on each side. In this case, 5.5cm (2 3/16in) from the centre. I marked these points with a pin, then used multiple pins to carefully count that there were the same number of threads on each side from the edges of the design. When I was satisfied that all was correct, I carefully drew a pencil line along each side following the grain of the fabric so the line was completely straight.
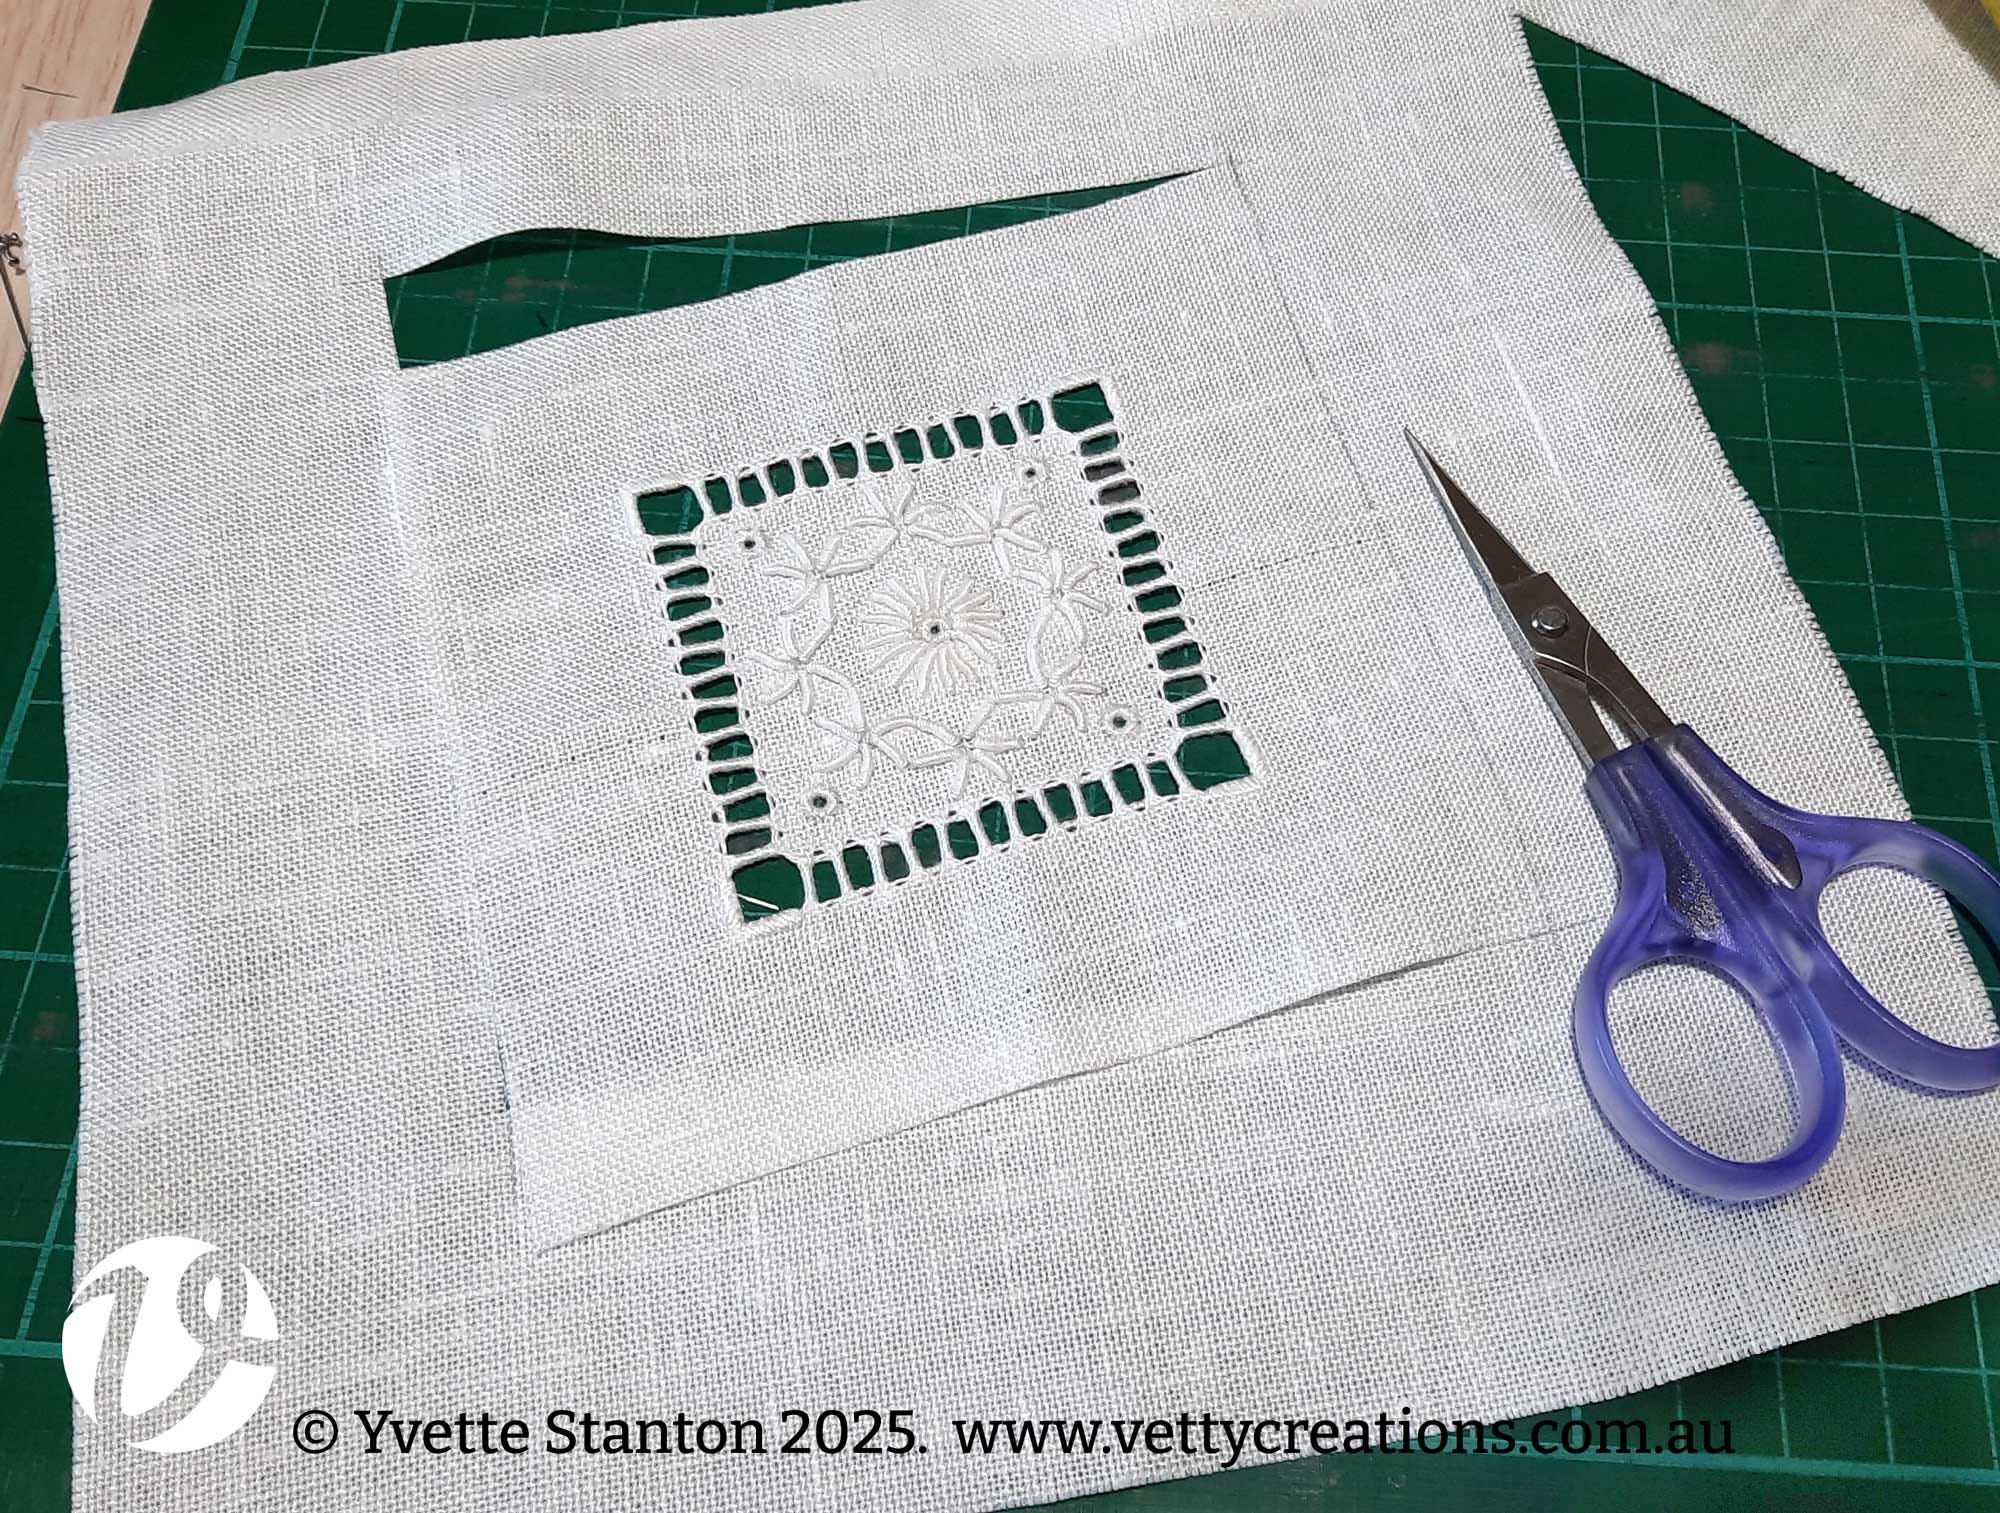
I carefully cut along the lines to trim the panel to 11cm (4 5/16in) square.
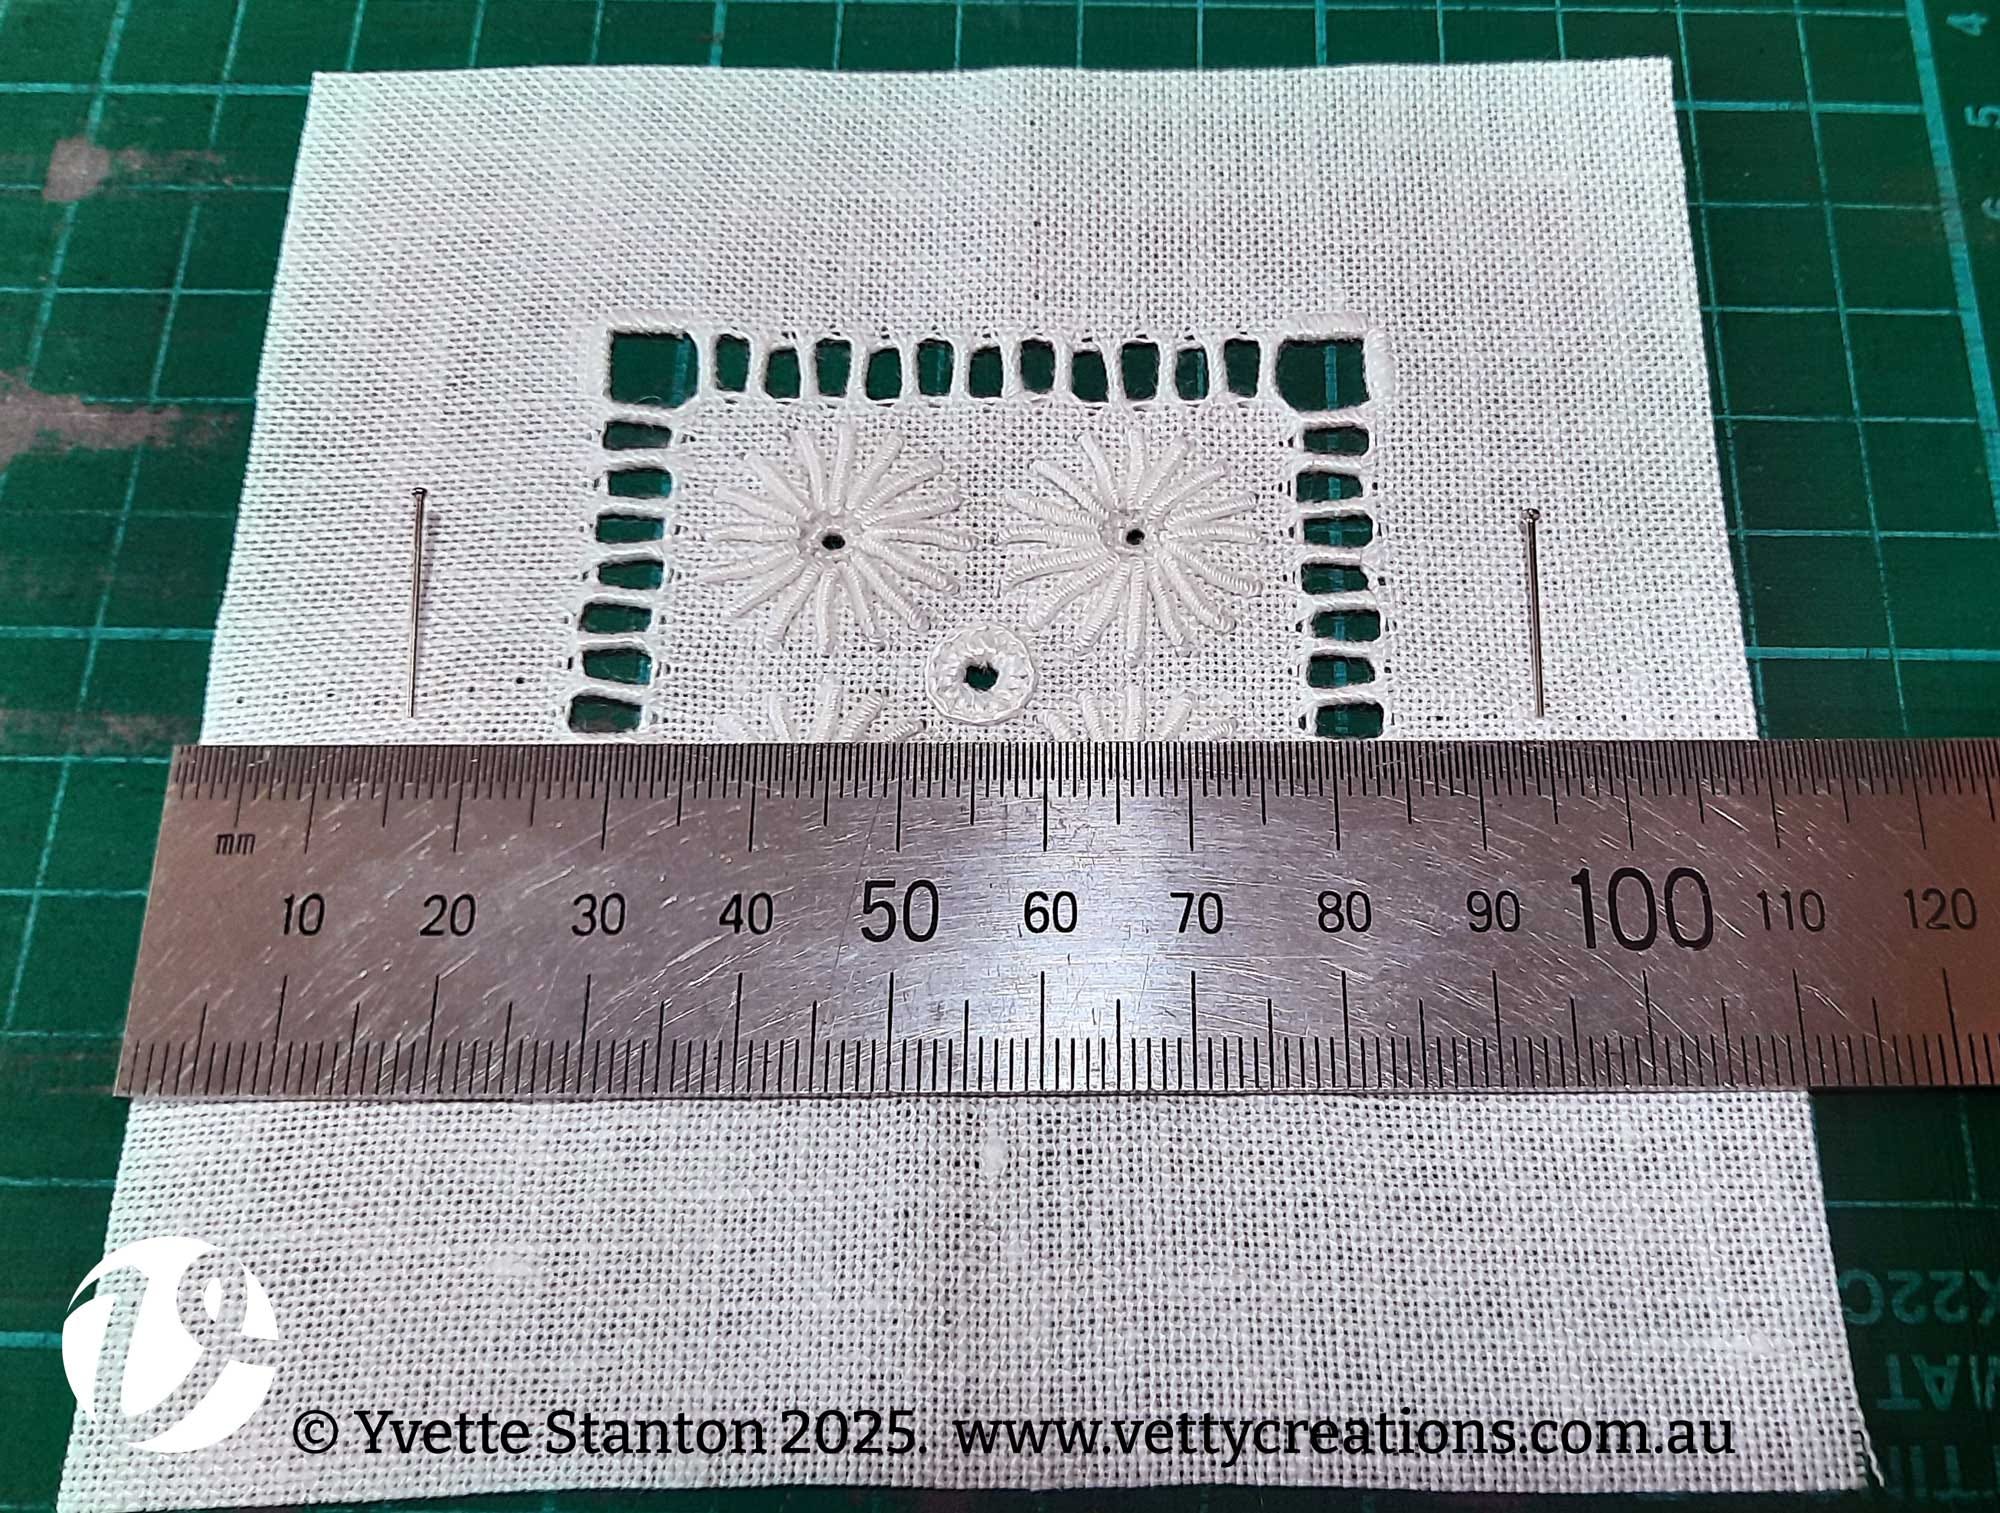
I measured in 1.5cm (9/16in) from each side and marked with a pin. The angle of the photo was chosen so that you can see the ruler markings - this meant that the left side looks inaccurate, though it wasn’t. This was repeated for the other axis. I carefully counted threads again, to make sure all the pins were the same distance away from the stitching.
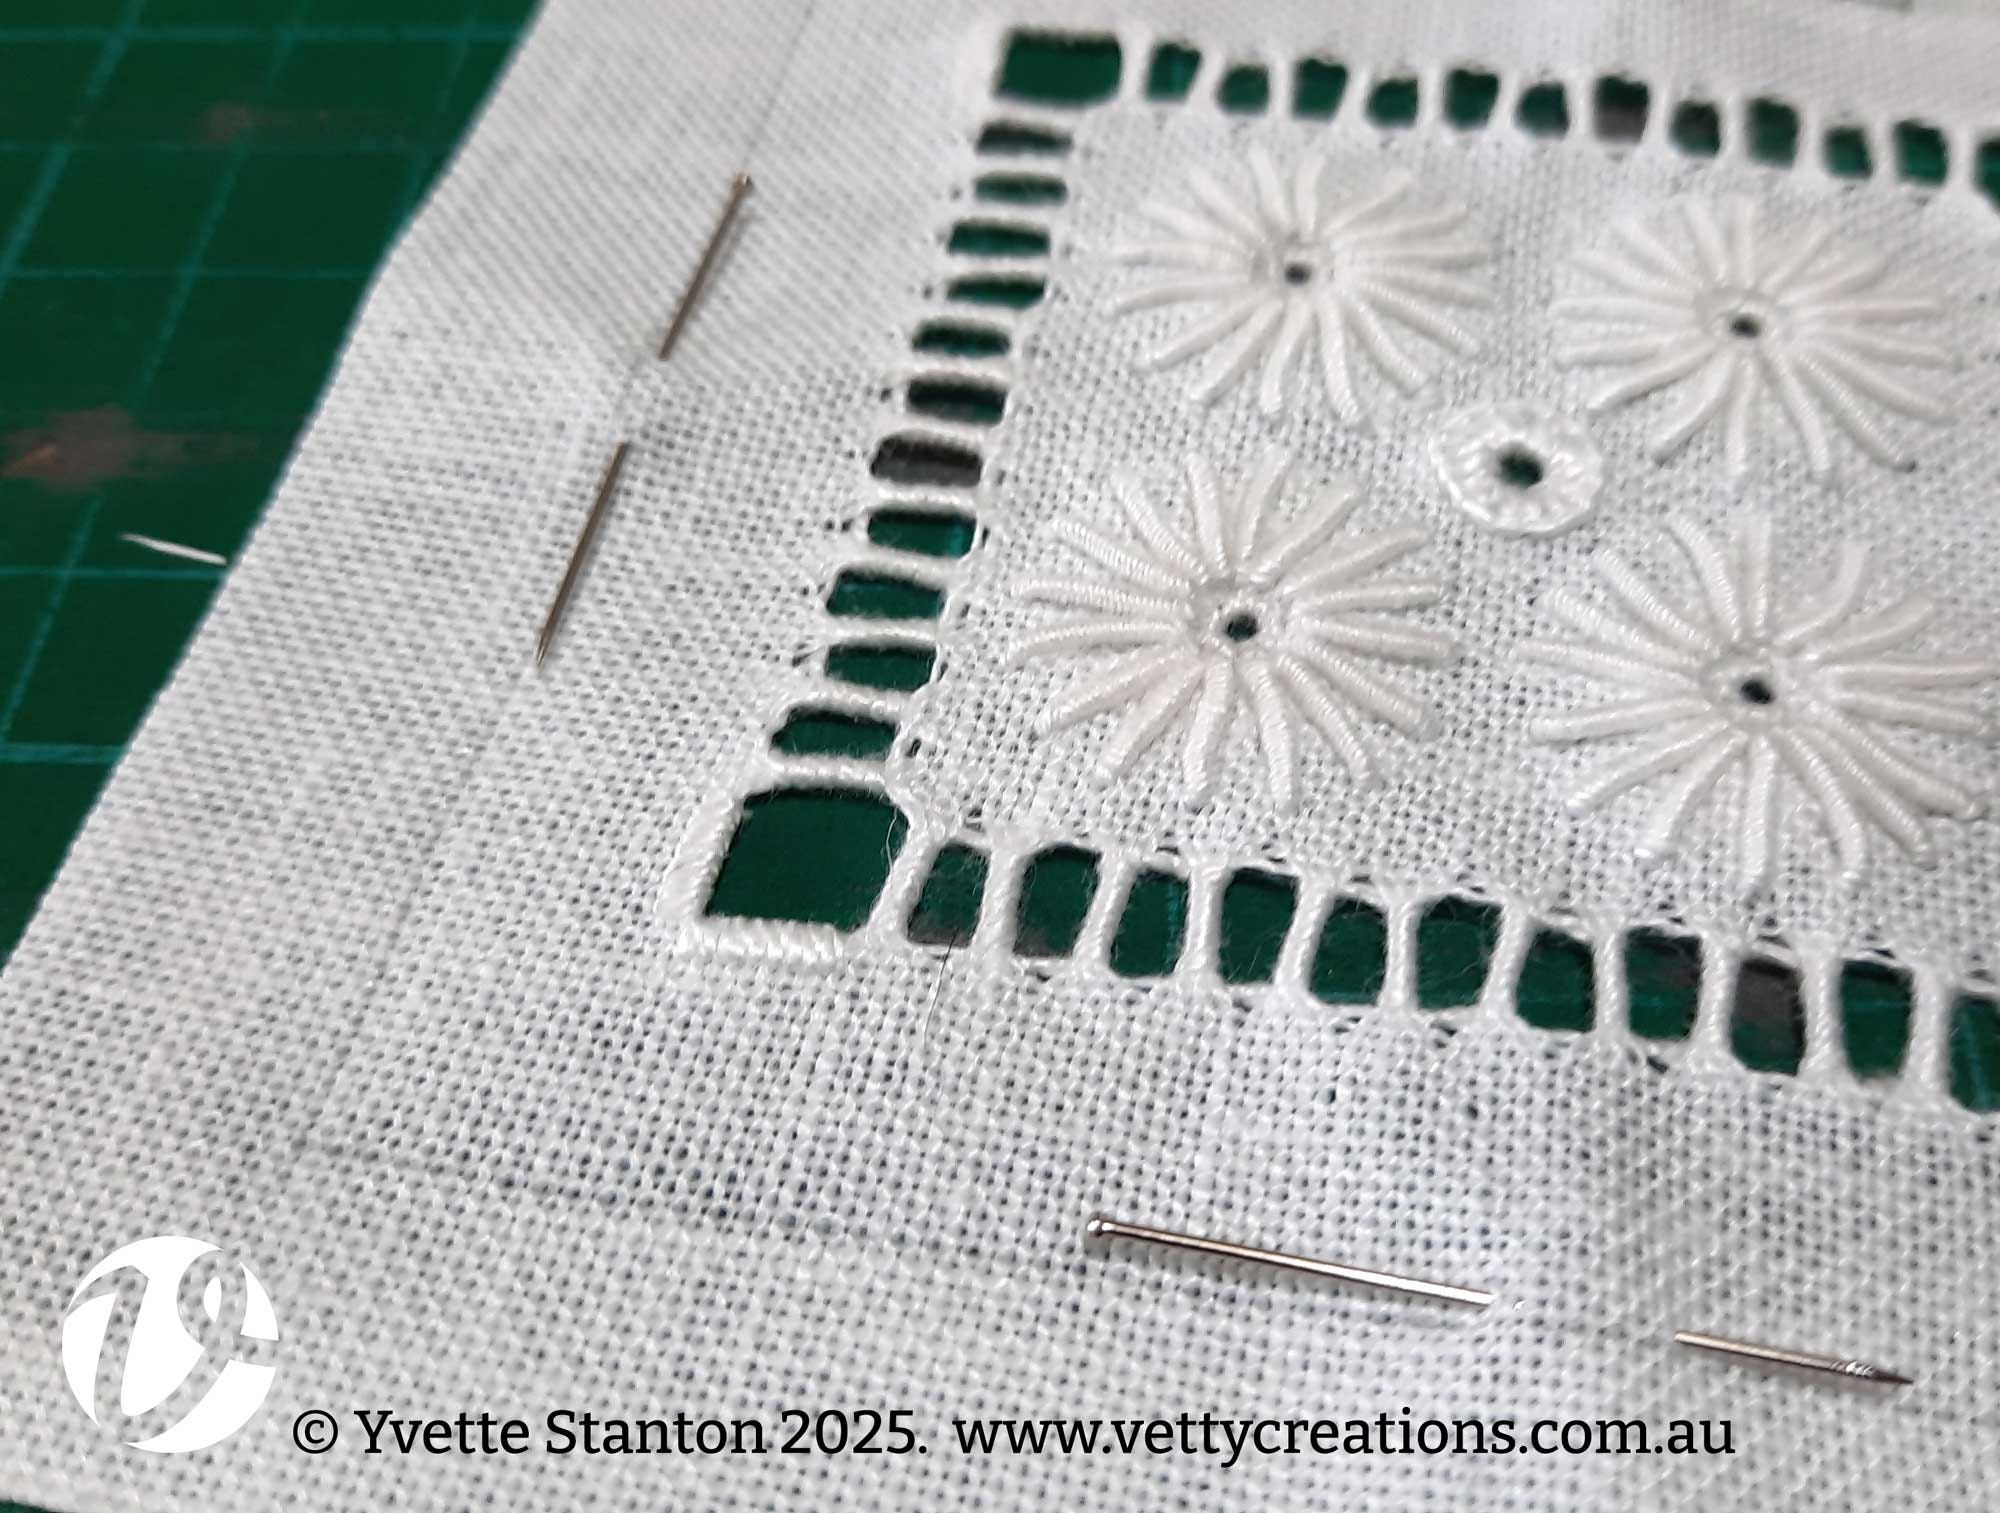
When I was sure the pins were placed correctly, I carefully drew a line one thread closer to the edge of the fabric, beside each of the pins. I drew these lines until they met in the corners. Once the lines were there, the pins were removed.
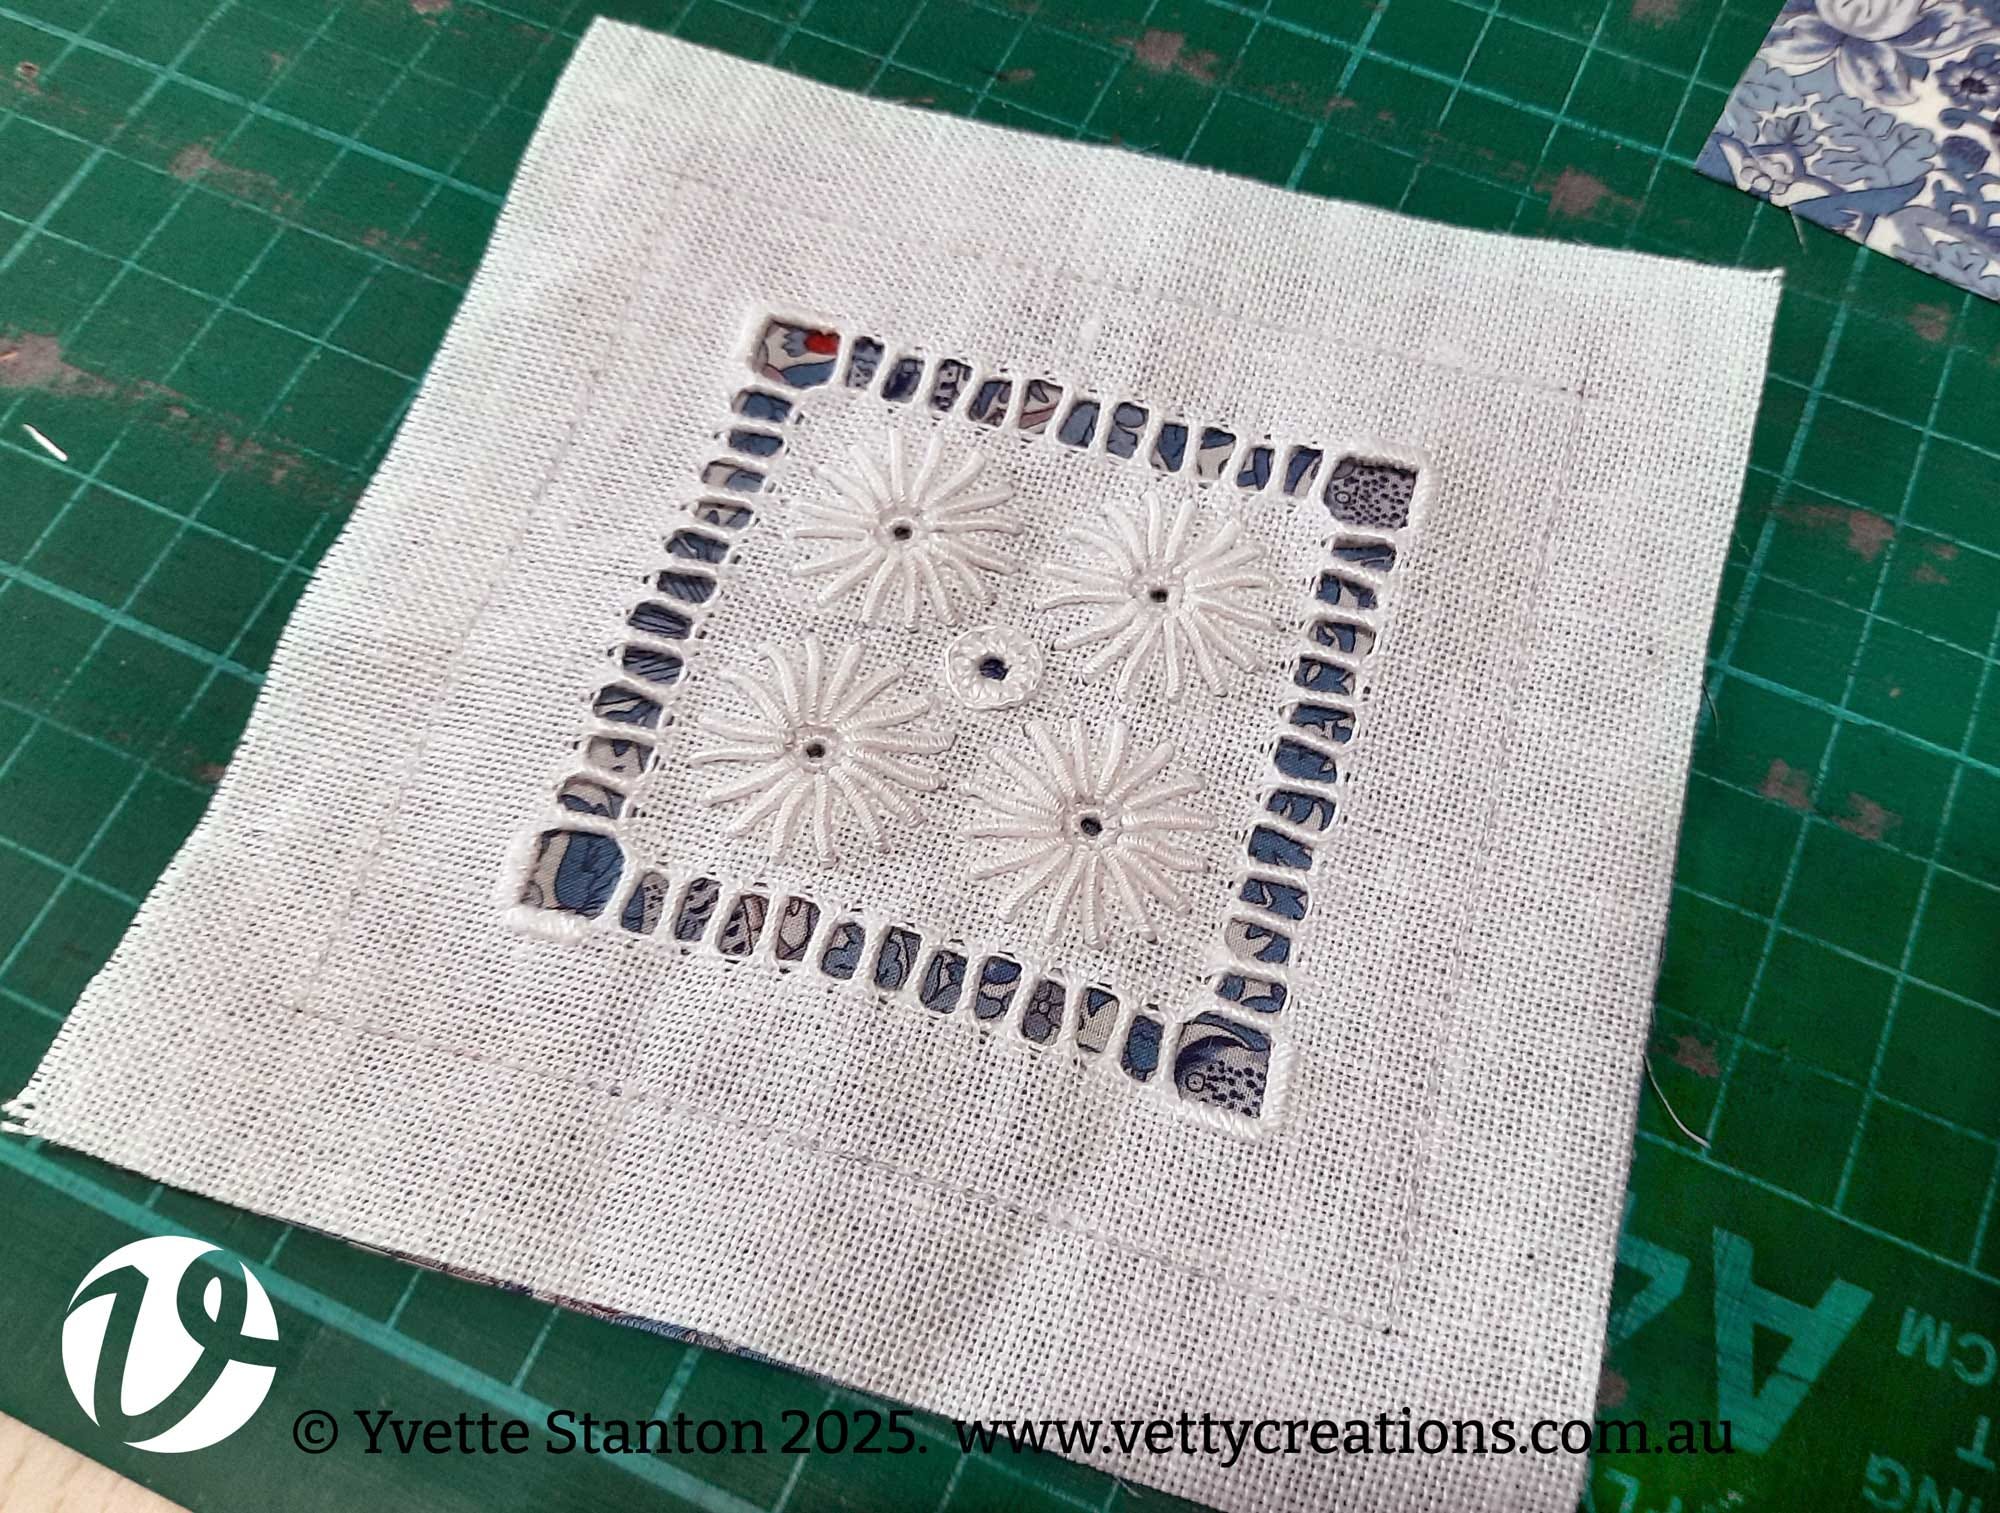
The lining (cut to 11cm/4 5/16in square) was pinned, right side up, to the back of the embroidered panel, matching the raw edges.
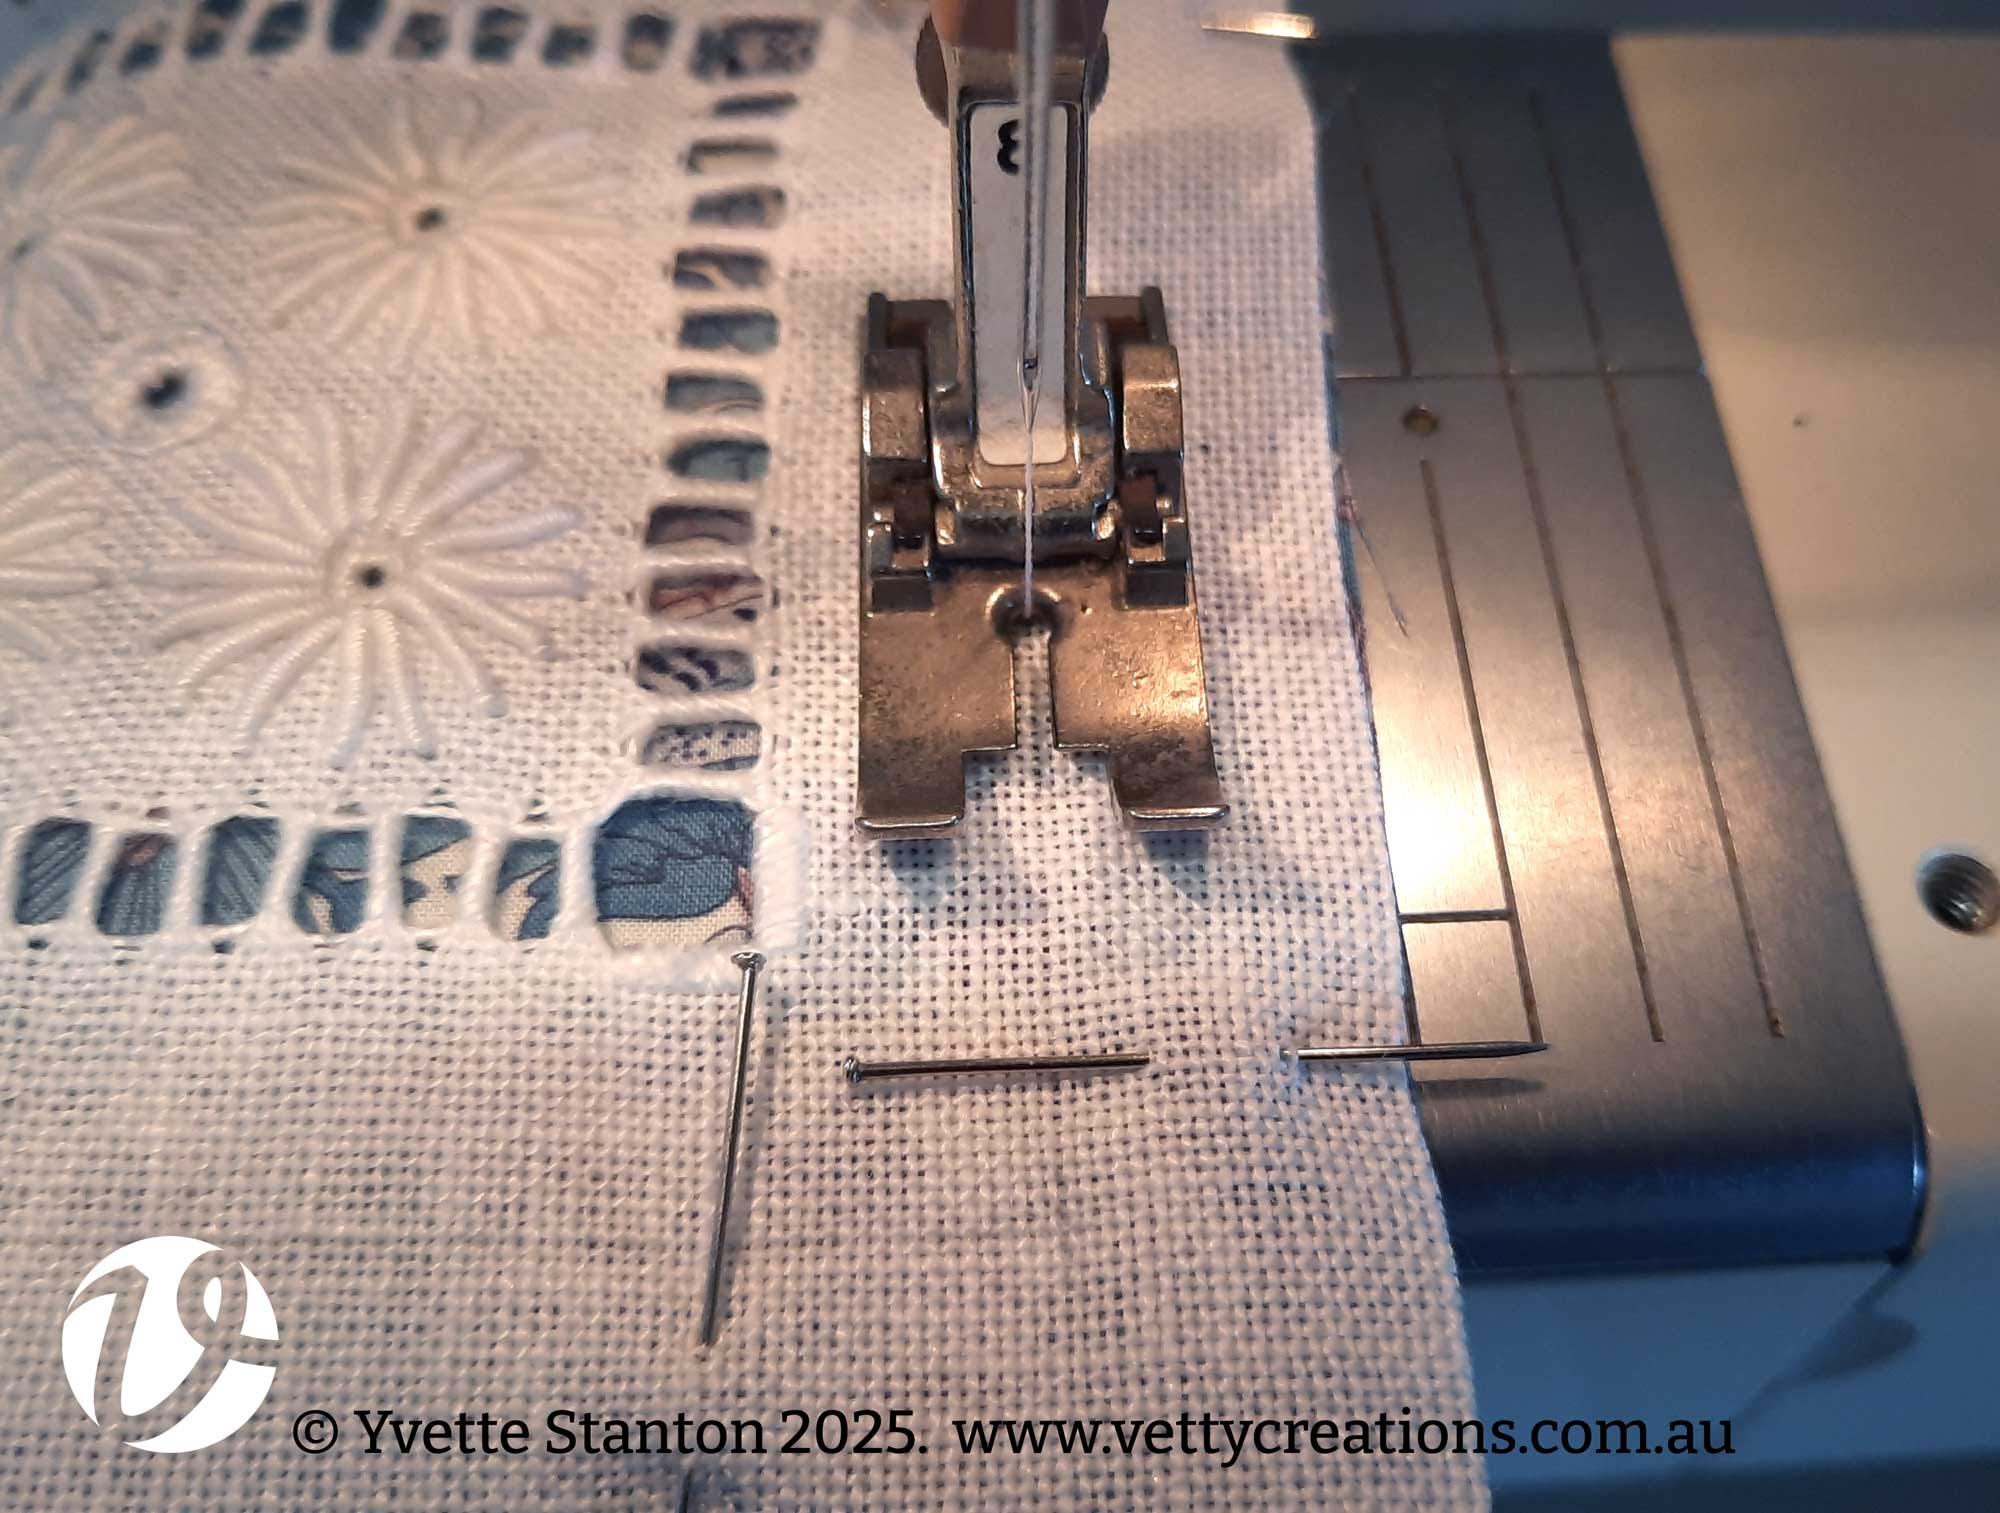
Using an “open toe” presser foot, I placed the panel on the sewing machine, so that the stitching line was central in the foot. The open toe of the foot means that you can carefully stitch along the line. I find starting sewing somewhere along a side is easier than starting and finishing in a corner. Yes, it would have been better to have the heads of the pins on the raw edge side, rather than on the inner side!
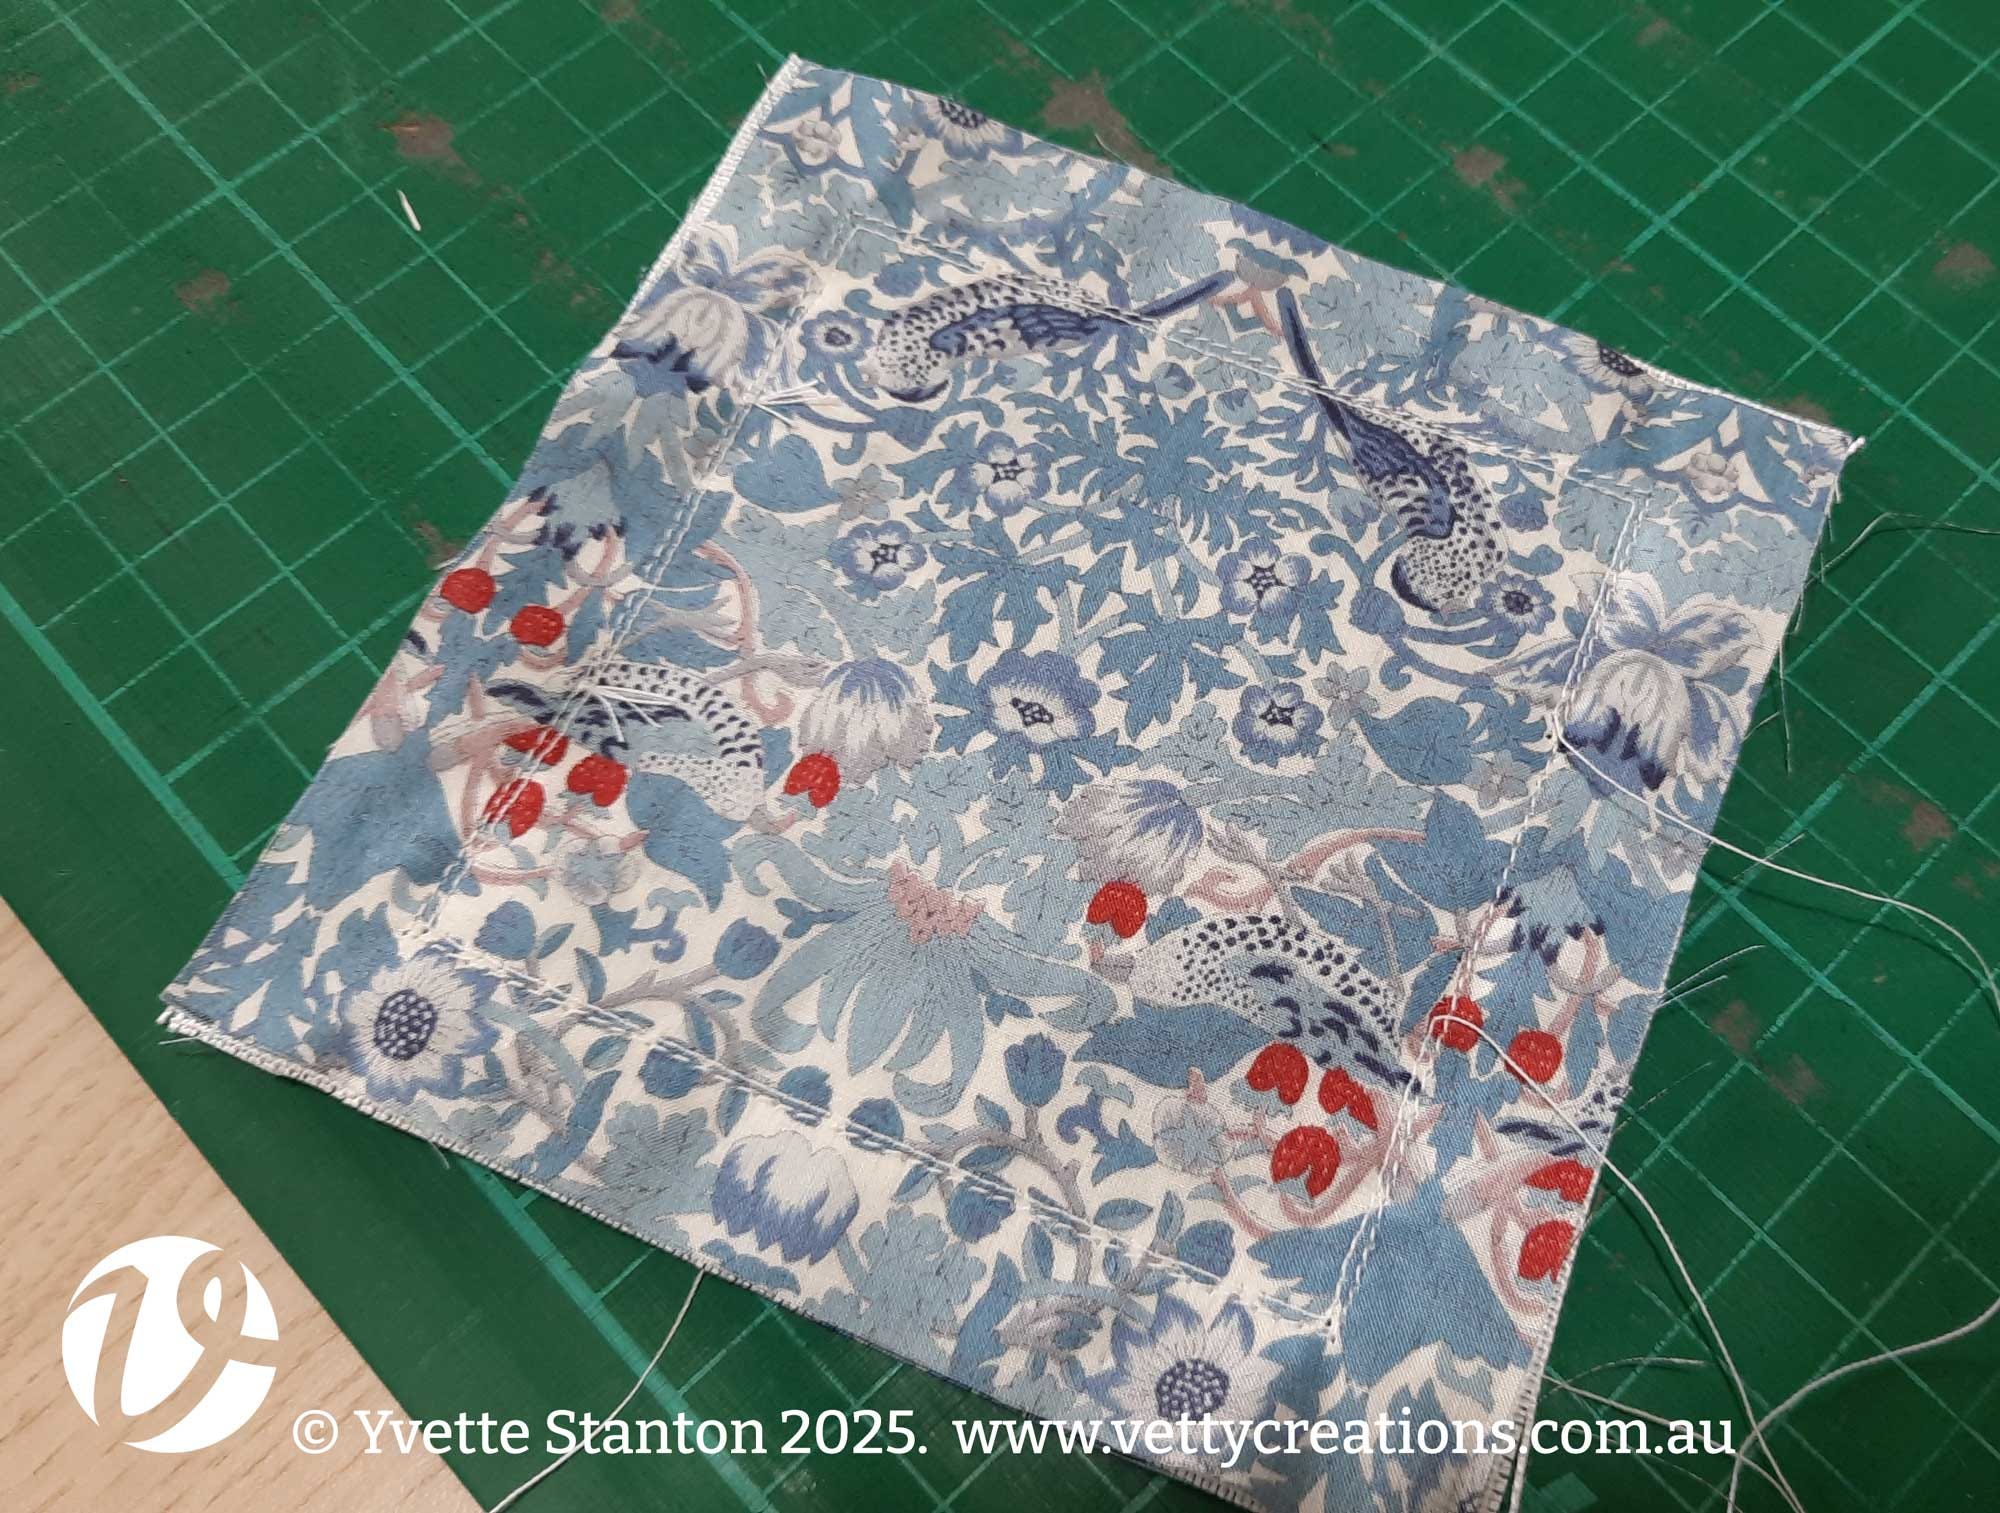
I sewed all the way around, carefully pivoting at the corners so that all stitching was directly on top of the drawn line. The ends were tied off on the lining side of the fabric. No gaps need to be left as this doesn’t get turned inside out - it remains as is.

I placed the backing fabric face up on the table, then the embroidered panel face down over it, matching the raw edges. With lining fabric on top, I pinned around the edges. In the photo you can see the three layers: lining fabric face down, embroidered panel face down, backing fabric face up.
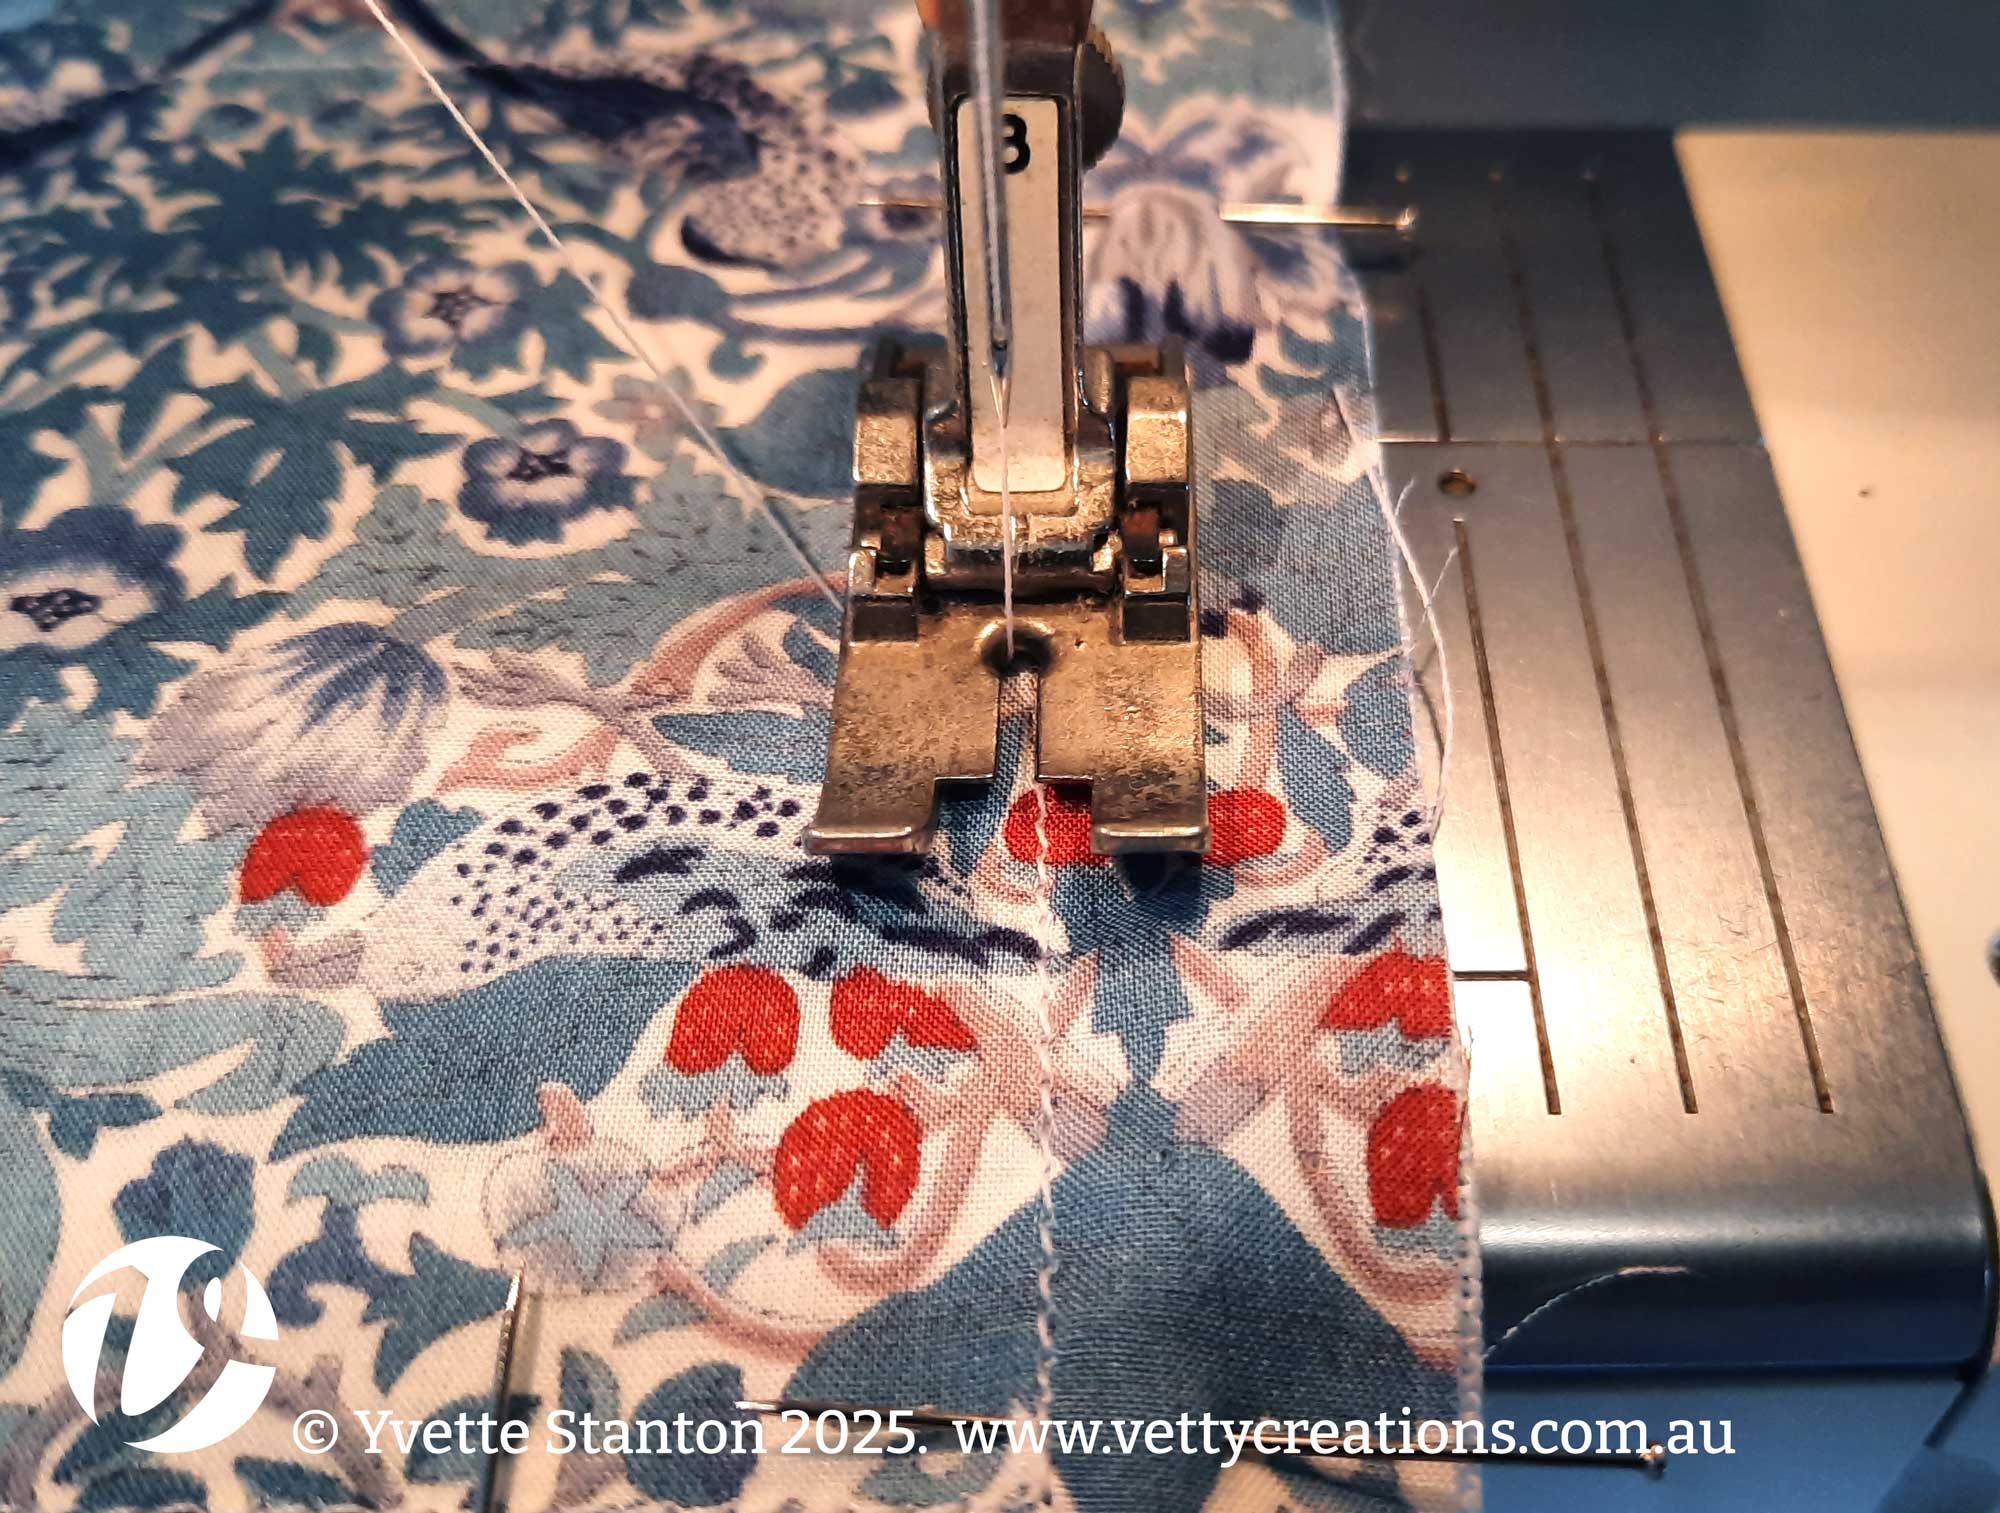
I put them in the sewing machine with the lining uppermost. The previous sewing line was just to the right of the needle. I lined up the previous sewing line with the right inner edge of the presser foot. If your presser foot is similar, you could do likewise.
The idea is that the seam line sits just inside the previous line of sewing. The first line of sewing runs accurately with the grain fabric, so by carefully sewing the actual seam parallel to it, it will also be in line with the grain of the fabric.
I started sewing about 1/3 of the side’s length from the closest corner, then carefully sewed just inside the previous line of stitching all the way around, back to the same side, stopping one 1/3 the length from the final corner. This left a gap of about 2.5cm/1inch. I kept the previous line of stitching aligned with the right inner edge of the presser foot at all times.
You can see how the second line of stitching sits just inside the first.
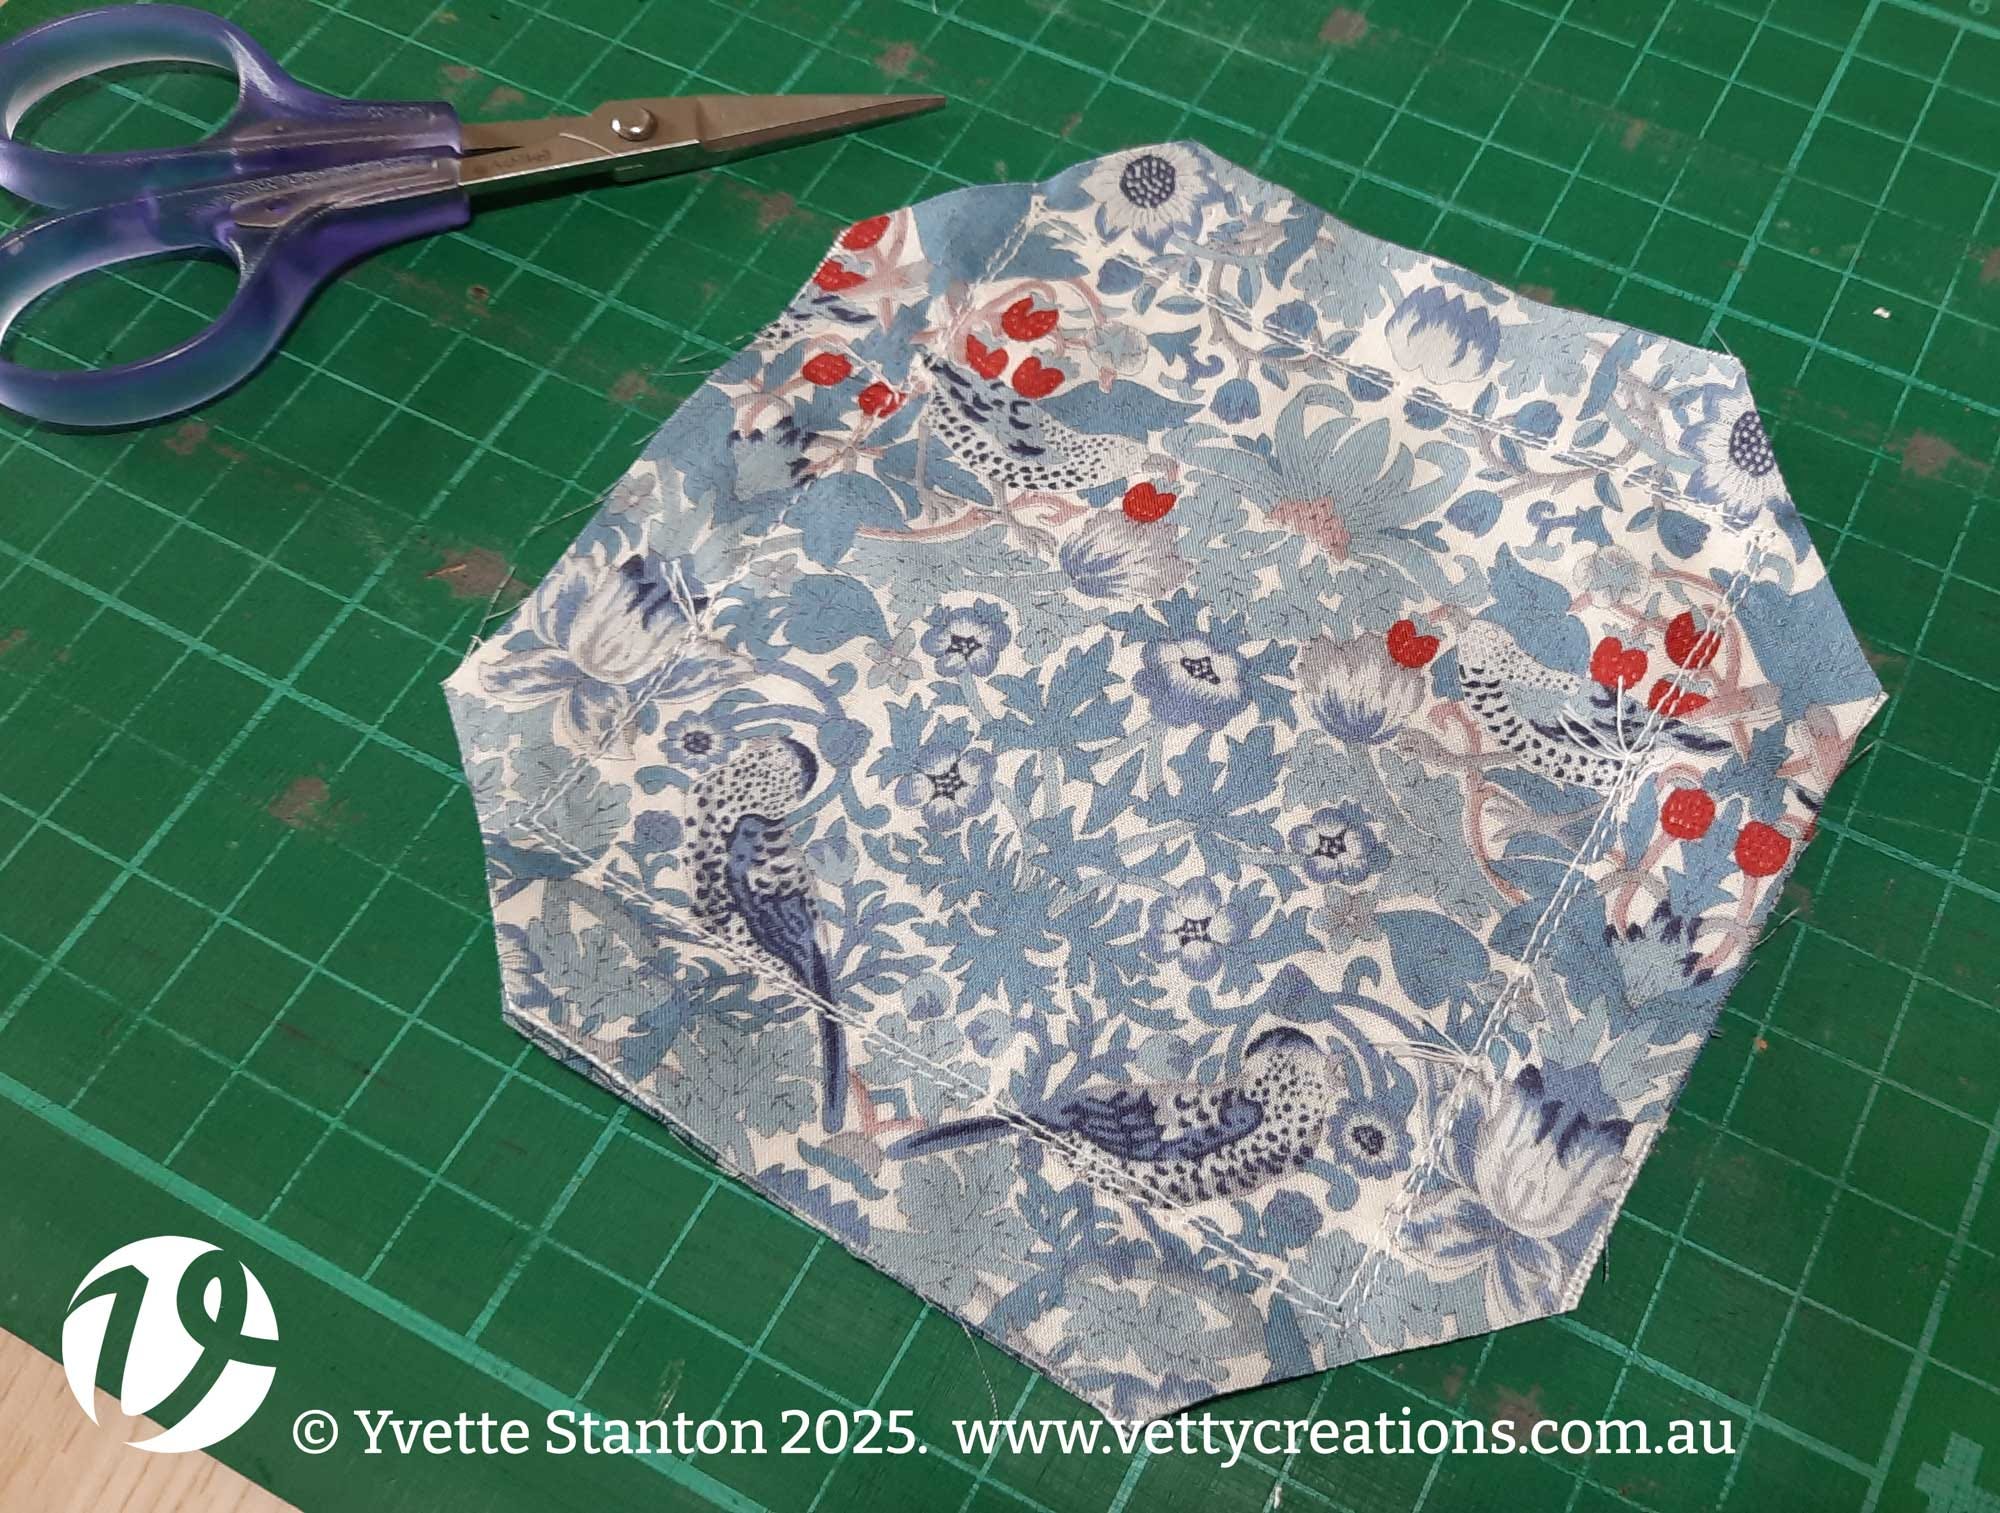
I tied off the ends of the stitching - shown on the upper left side - leaving an open gap in that side. I then cut off the corners of the square to aid with turning the corners nicely. I trimmed the corners off at 45 degrees, to just outside the outer line of stitching.
I then turned the whole thing right way out through the gap in the stitching. It was a little tricky, so I just pulled it through, little by little. There’s no need to rush, after all! The video shows a different backing fabric and embroidered panel as I forgot to film this step originally.
Once the pillow was turned right side out, I needed to get the corners out properly. I used a knitting needle (to push from the inside) and a large needle (to pull from the outside) I apologise for the state of my left thumbnail - moving furniture breaks nails!
I used polyester fibre fill to stuff my pillow. I used small amounts, pushing them in, and making sure they were distributed evenly within the pillow, particularly into the corners. You can see me pressing on the pillow a few times to gauge how full it is and whether I feel it needs more. An overstuffed pillow tends to be hard and unwelcoming. A not-enough-stuffed pillow is floppy and sad. In this case, I just wanted enough filling to give it some shape. This is not a pillow you’ll sit against!
Using a fine needle and sewing machine thread, I sewed the pillow closed with a ladder stitch. The video shows me stitching from left to right as I am left-handed. Right-handers can do it the other way.
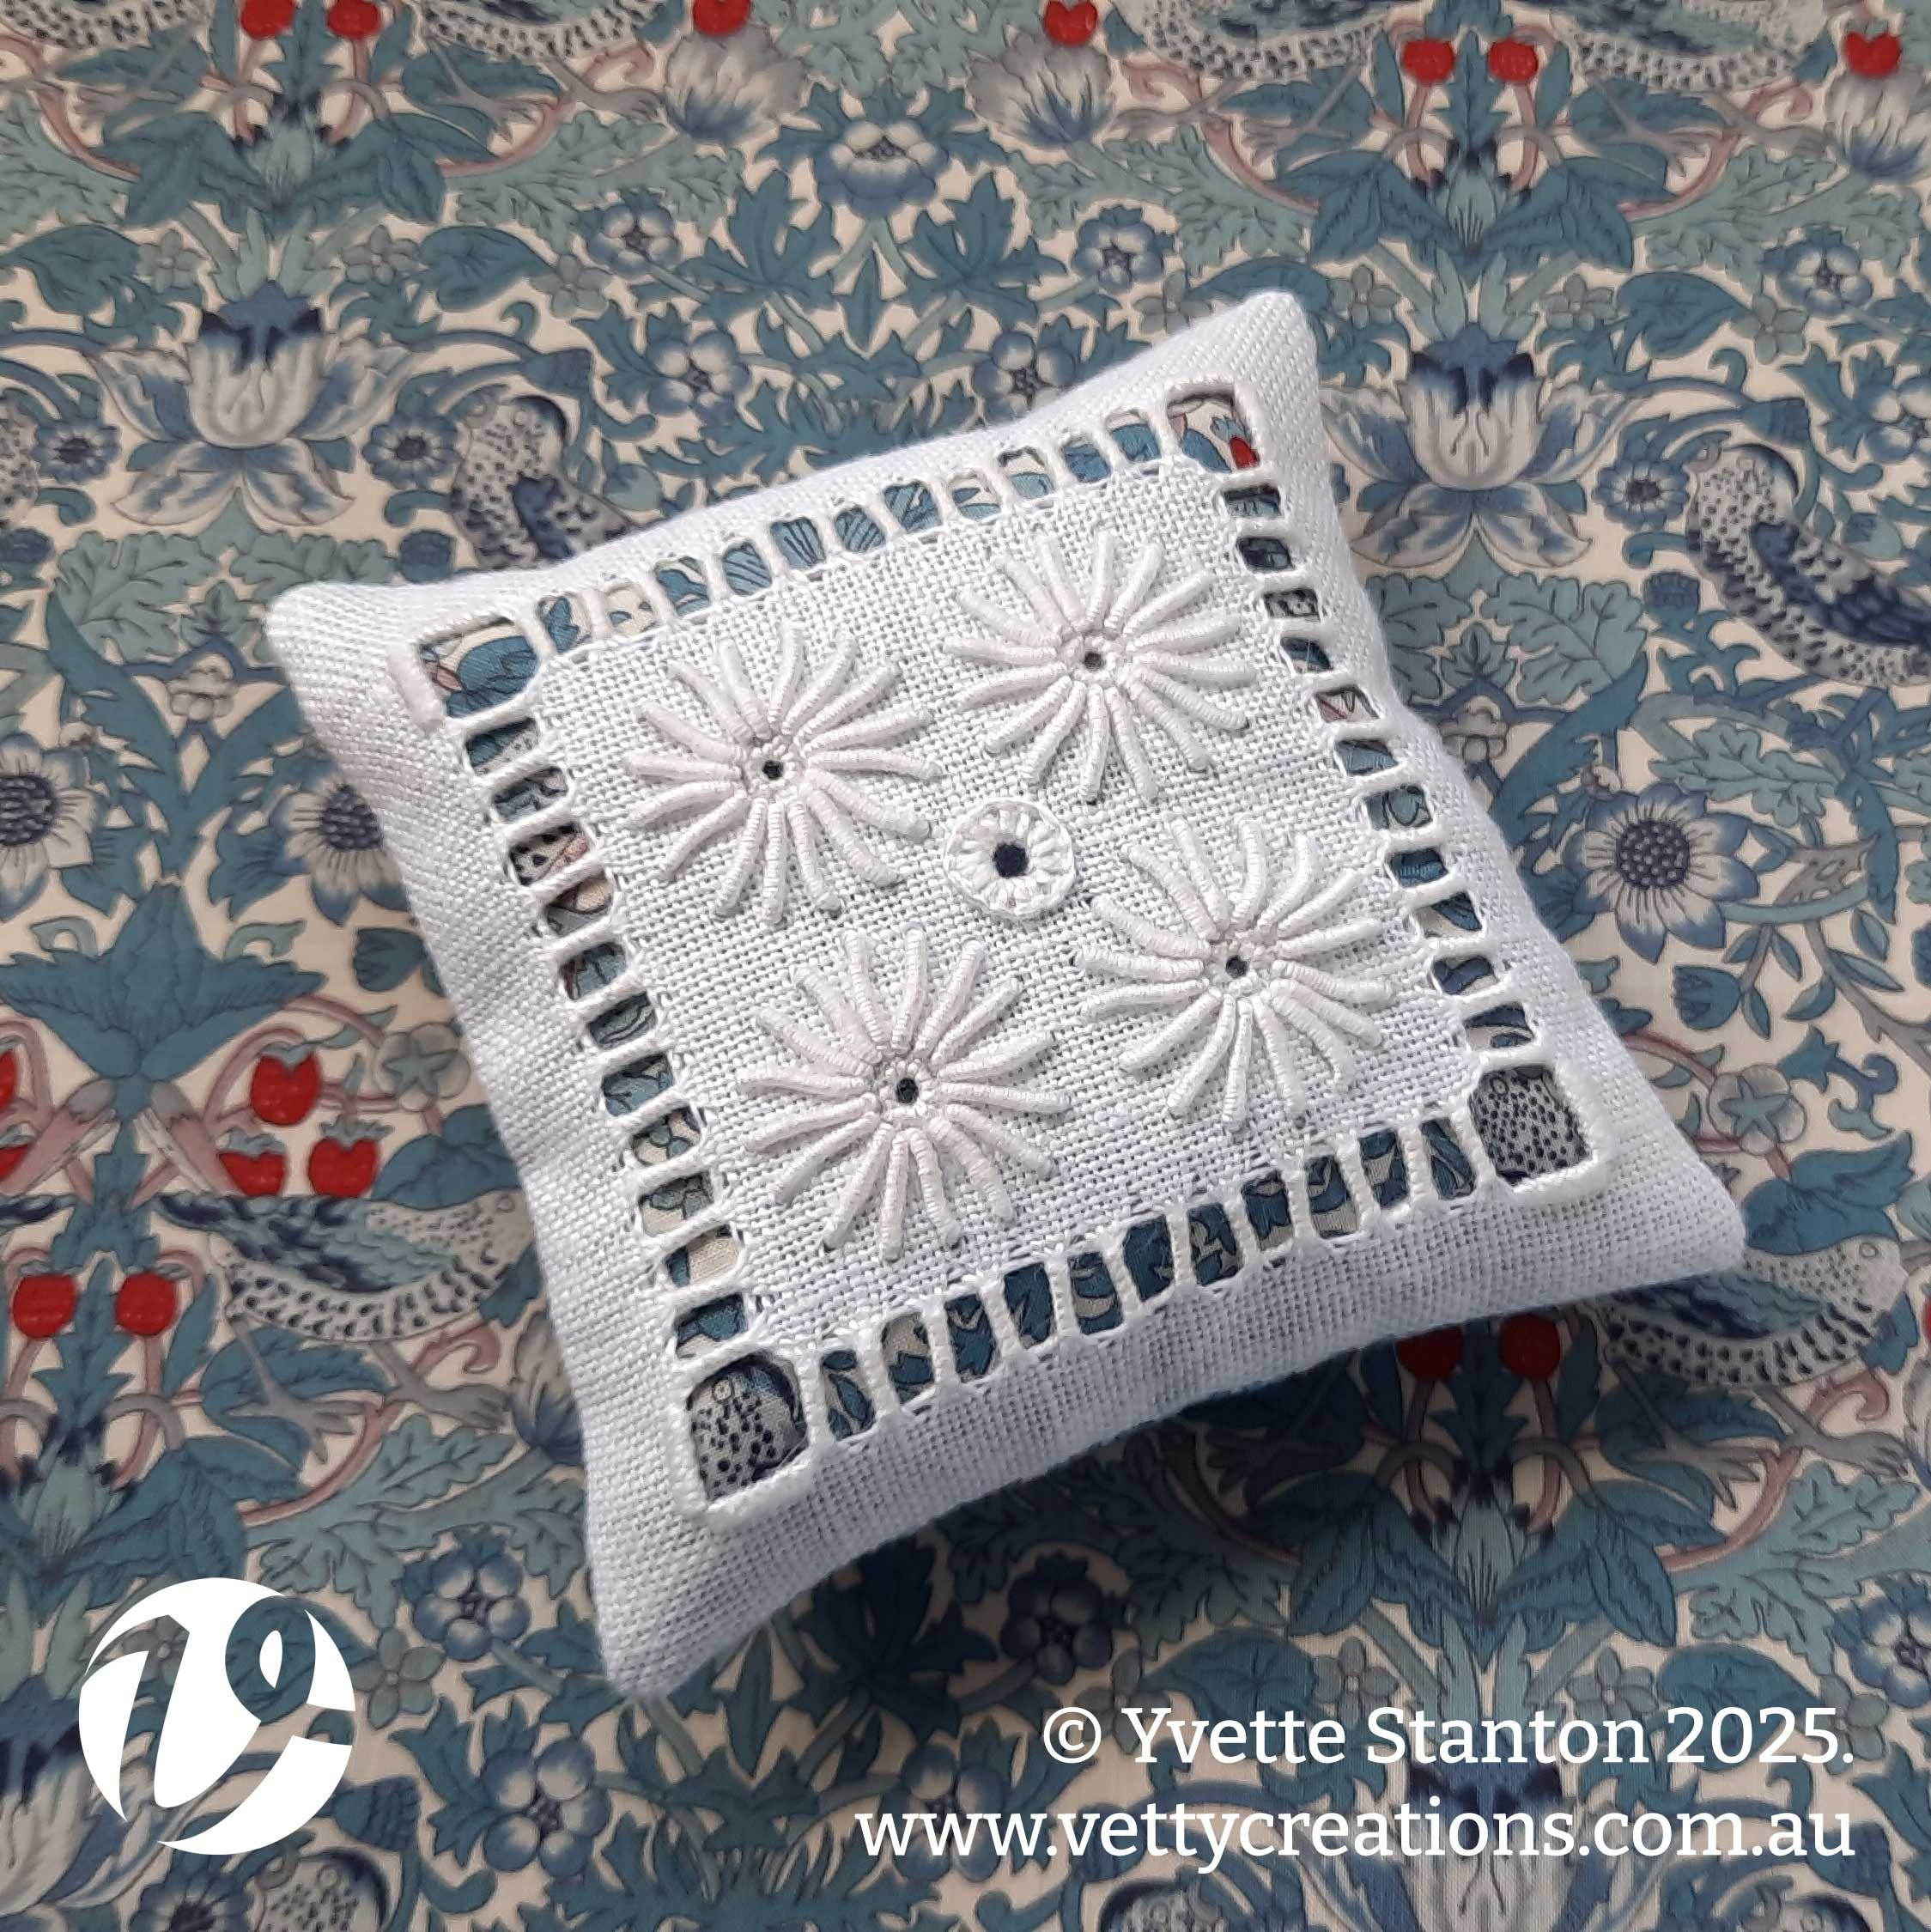
So there you have it. I hope that the main concept you have gained from this tutorial is one of not rushing, taking care and going slowly. Take your time. If something doesn’t sit right, undo it and redo until it is right.
Some people are scared of doing their own finishing. You don’t have to be. You can do it! But you do have to do it with care. Near enough isn’t good enough if you want the results to sing. Near enough isn’t good enough if you want to show of your beautiful embroidery to its best advantage.
If you have questions, please just ask.
Hi Yvette! This is great, some time ago, I made the first small piece in your Portuguese book and its waiting to be finished into a small pincushion, how did you know I needed help with finishing it??!! I just took out your book again and gosh such lovely patterns. I must get back to some of this type of whitework
Thank you for these instructions! I will remember to come here in the future when I need to make a pillow. Starting small looks like a good idea.